FoodNanny - Multi Restaurant Food Delivery App with PWA Website & Laravel Admin with AI Assistant
Start your own multi-restaurant food delivery business with FoodNanny, built-in tools for vendor management, deliveries, POS, payouts, and more. Ideal for startups to large marketplaces, it simplifies operations & boosts growth.
Basic Knowledge
To install, set up, and publish foodnanny with your branding, it's necessary to possess fundamental knowledge in server-side configuration.
- IDE for Web development, we prefer VSCode.
- Real server related knowledge like apache or local machine server, we prefere to use a real server.
- Server related knowledge and we preferred cPanel in your server for quick installation
- Basic knowledge in PHP, NPM, Vue, Node and Laravel.
- Basic knowledge about firebase
Server Prerequisite
FoodNanny is dependent on PHP version 8.2 or higher and MySQL version 8.0 or later. Additionally, the following server configurations and PHP extensions are necessary. Before install, please make sure you have the components bellow enable on your server
- PHP 8.2 or Greater
- OpenSSL PHP Extension
- PDO PHP Extension
- Mbstring PHP Extension
- Tokenizer PHP Extension
- PHP JSON
- PHP cURL
- XML PHP Extension
- Ctype PHP Extension
- BCMath PHP Extension
- PHP Zip Archive
- Exif PHP Extension
- Fileinfo PHP Extension
Typically, these extensions are enabled by default on most servers, but it is recommended that you confirm with your hosting provider.
Please proceed with caution and take great care in completing this task. Any errors made will not be the responsibility of our team.
cPanel Database Setup and File Configuration
php.ini Requirements:
open_basedir must be disabled
Note: Remember! The script doesn't have any "install" folder or directory. The installation is controlled by a Controller.
Now Follow the steps below to setup the script:
- Unzip the downloaded package from here and open the Source Code folder. You will find the web folder. In web folder there is the foodnanny.zip file. you need to upload foodnanny.zip file to your hosting web server using FTP or cPanel, then you need to unzip this file, you will find "foodnanny" folder. You need to move all files and folders in your domain's document root directory.
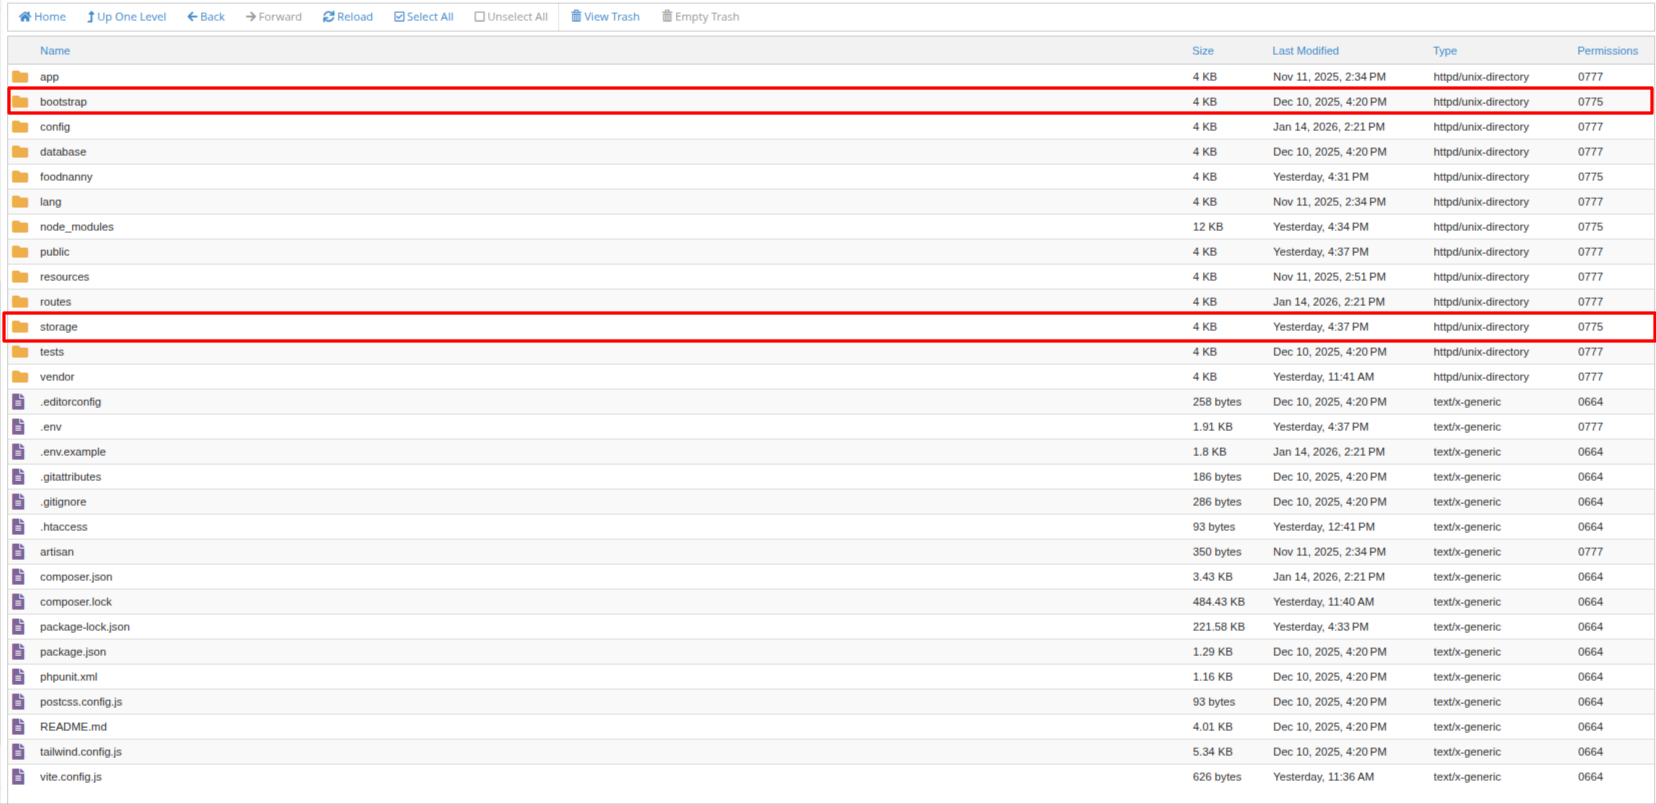
- You will have these files and folders in your document root:
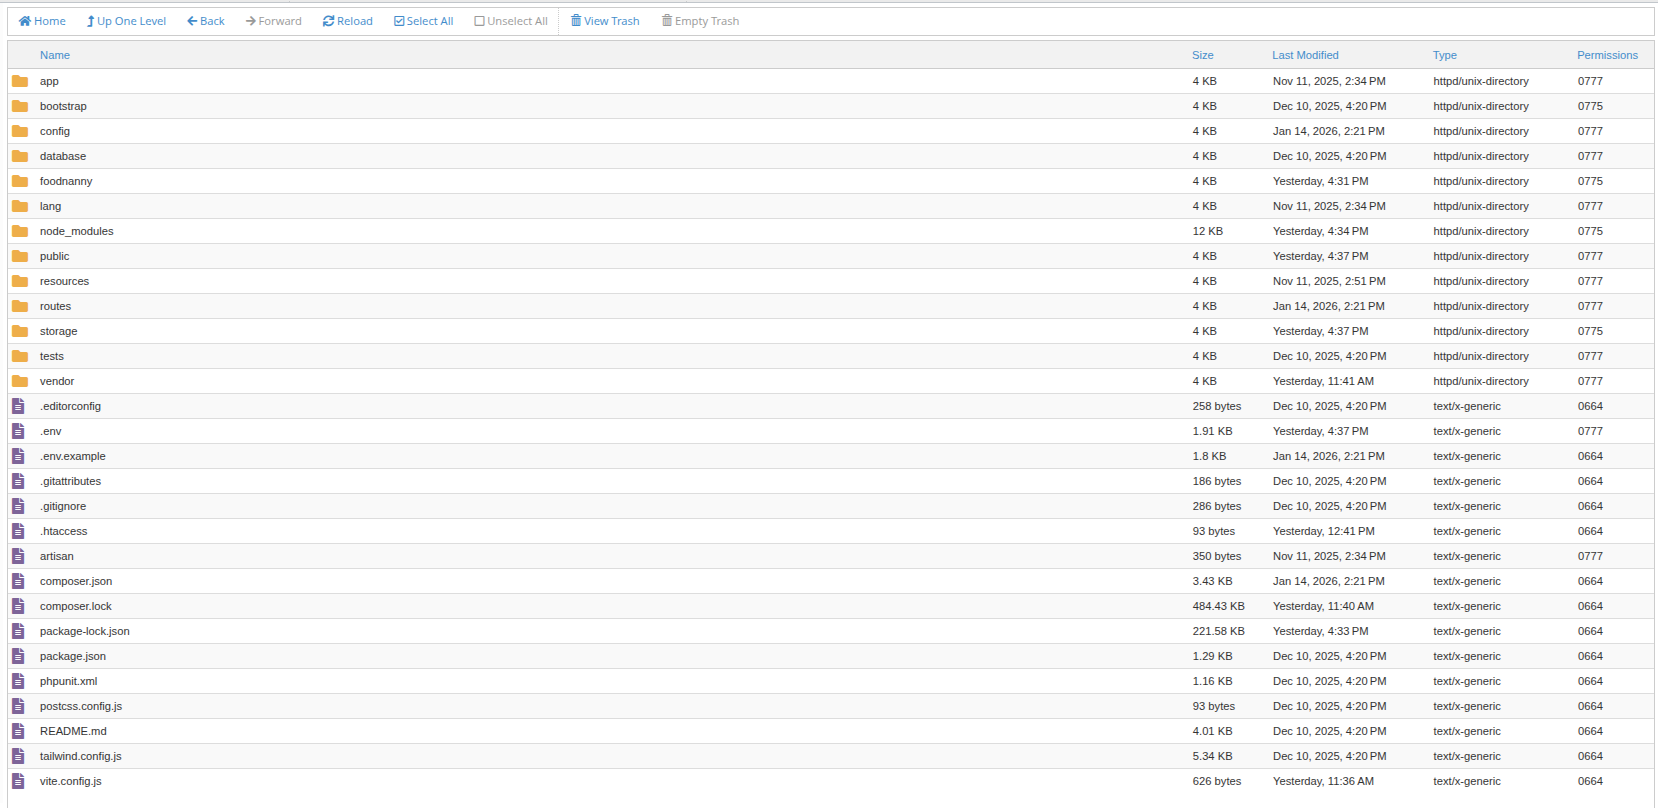
- Make sure /bootstrap/cache, /storage/framework and /storage/logs folder have permission as 755
recursively. If you don't have 755
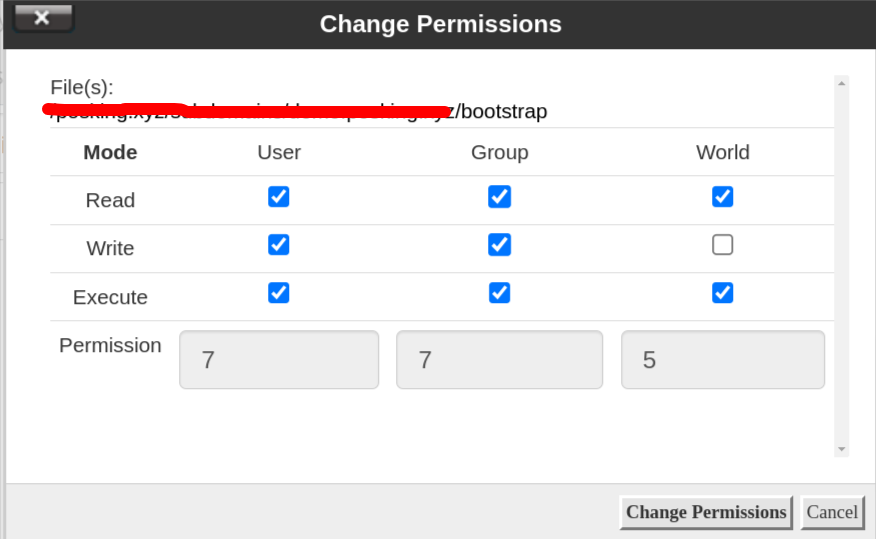
permission in these folders, you have to give permission manually. To give permission right click on
the folder and click "Change permission" button, you will see the prompt to change permission like the
second image below. Select the checkboxes you can see in the second image.
-
Before starting the installation, database must be configured for the application. For creating the
database, the following ways must be maintained
- From cPanel Go to MySQL Databases
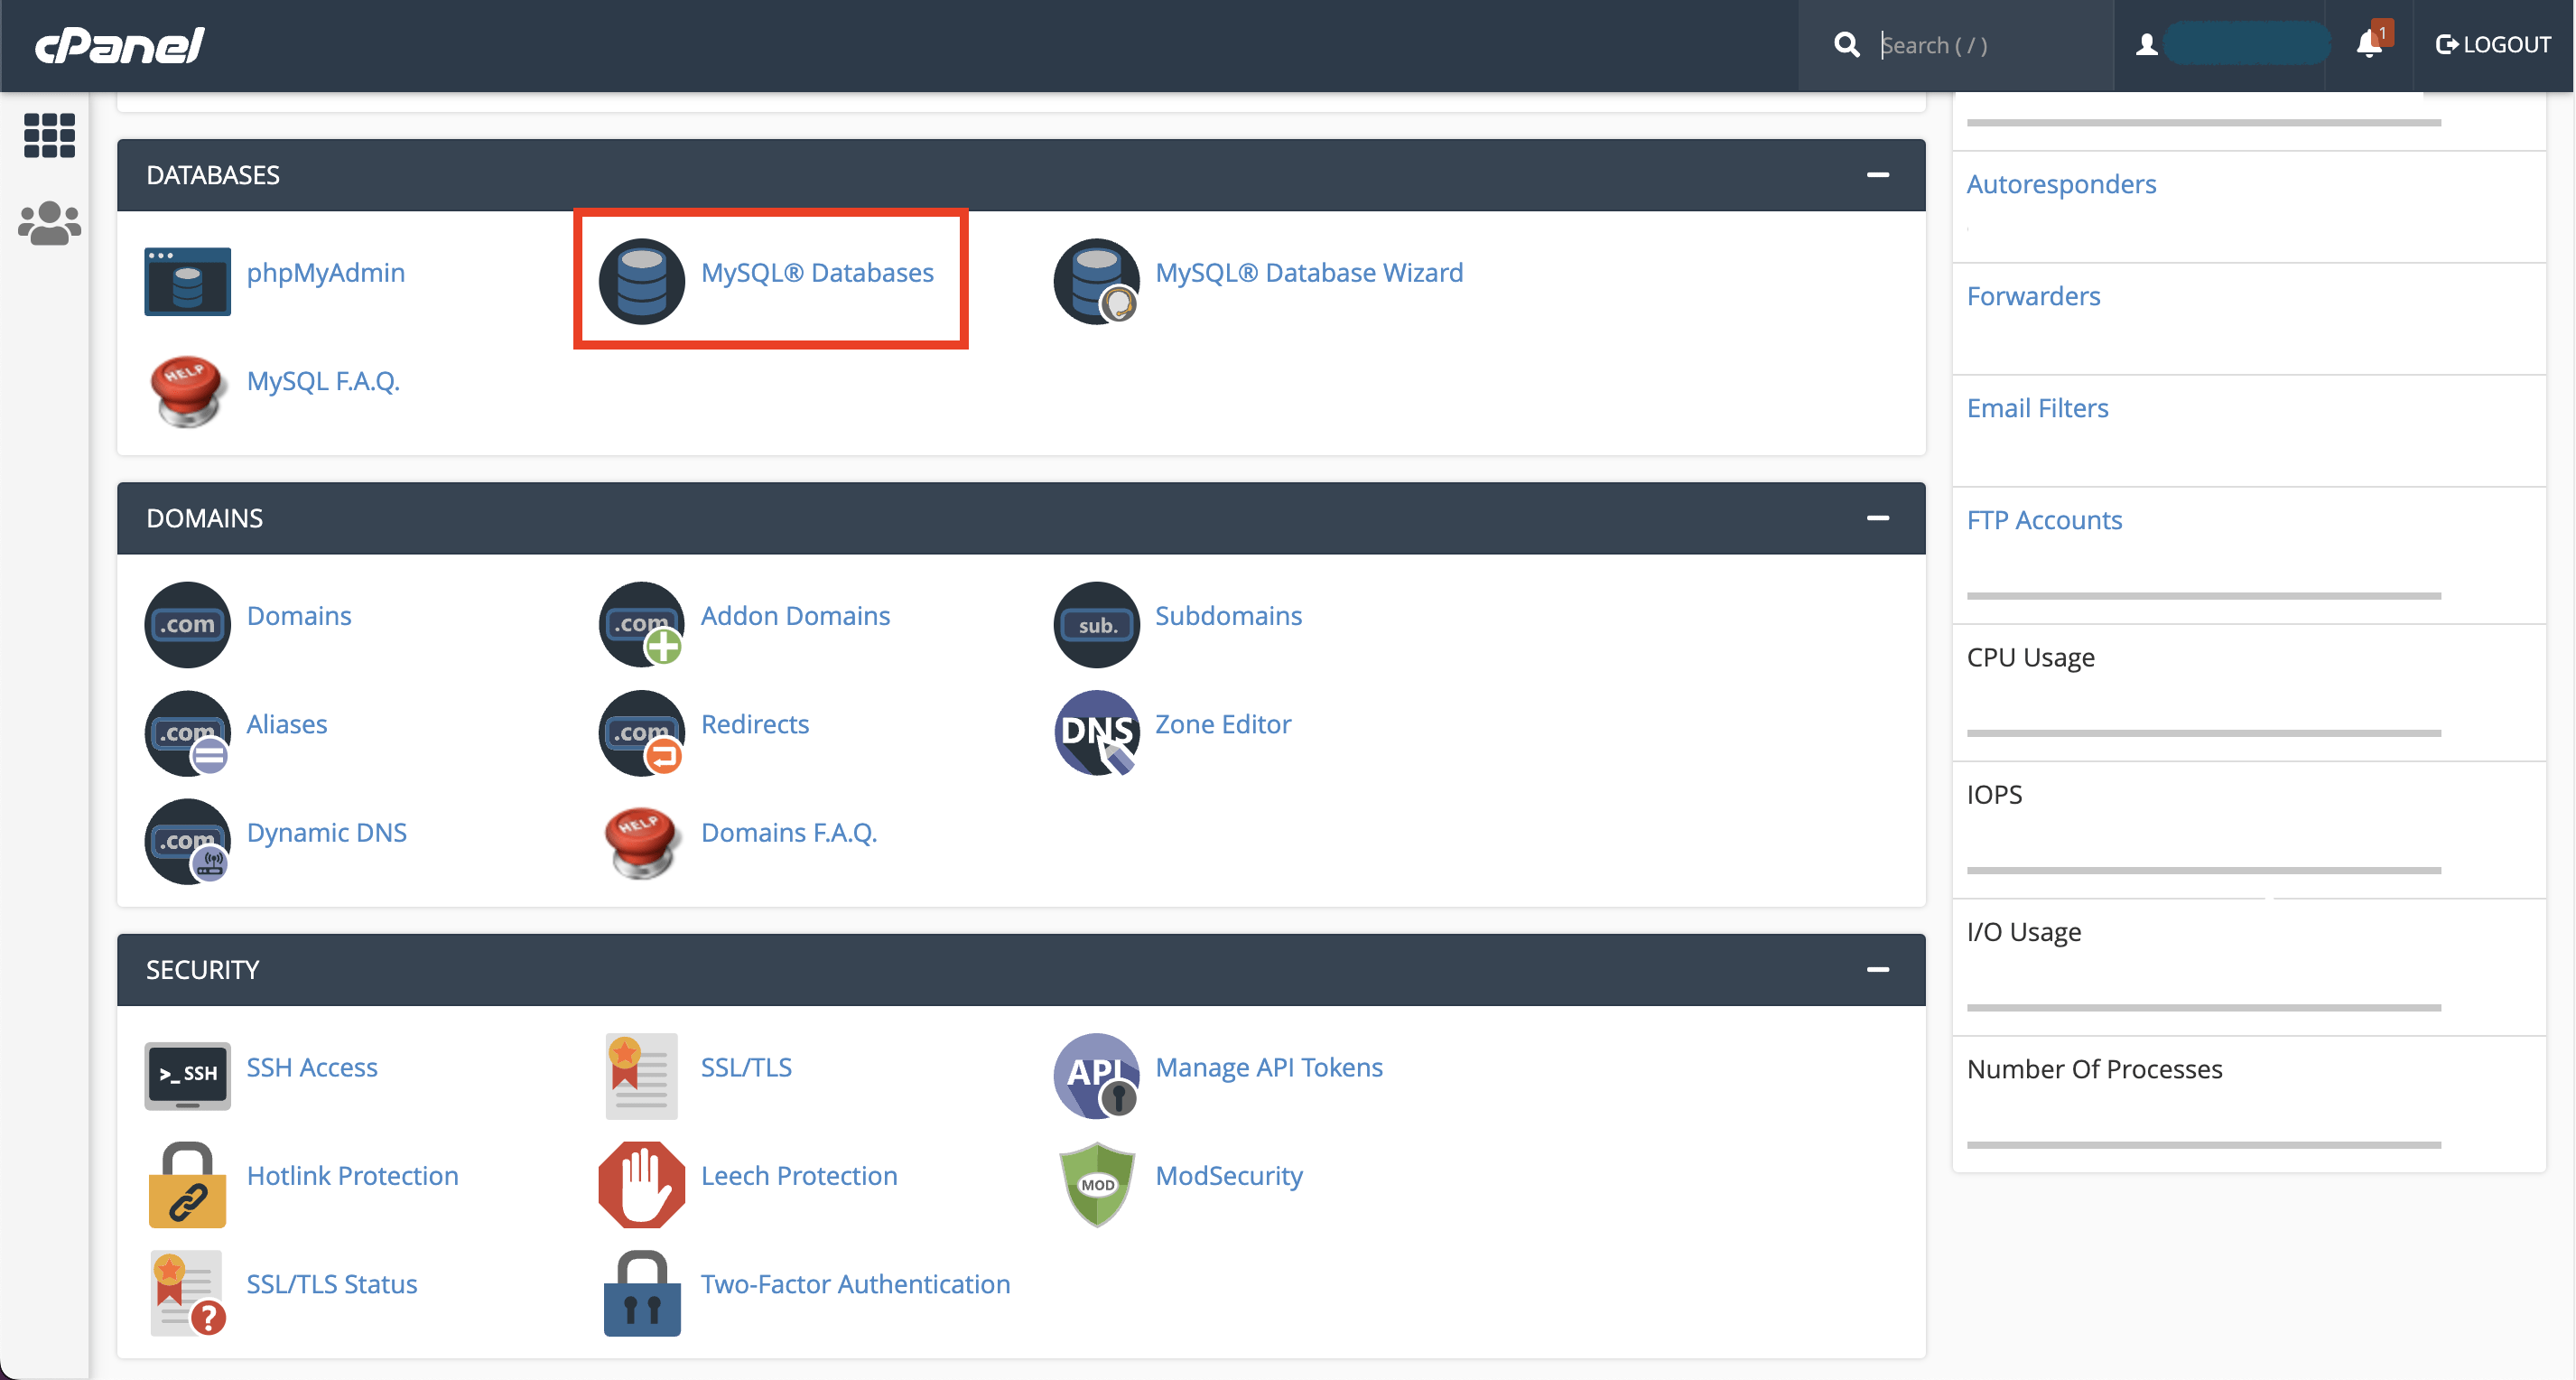
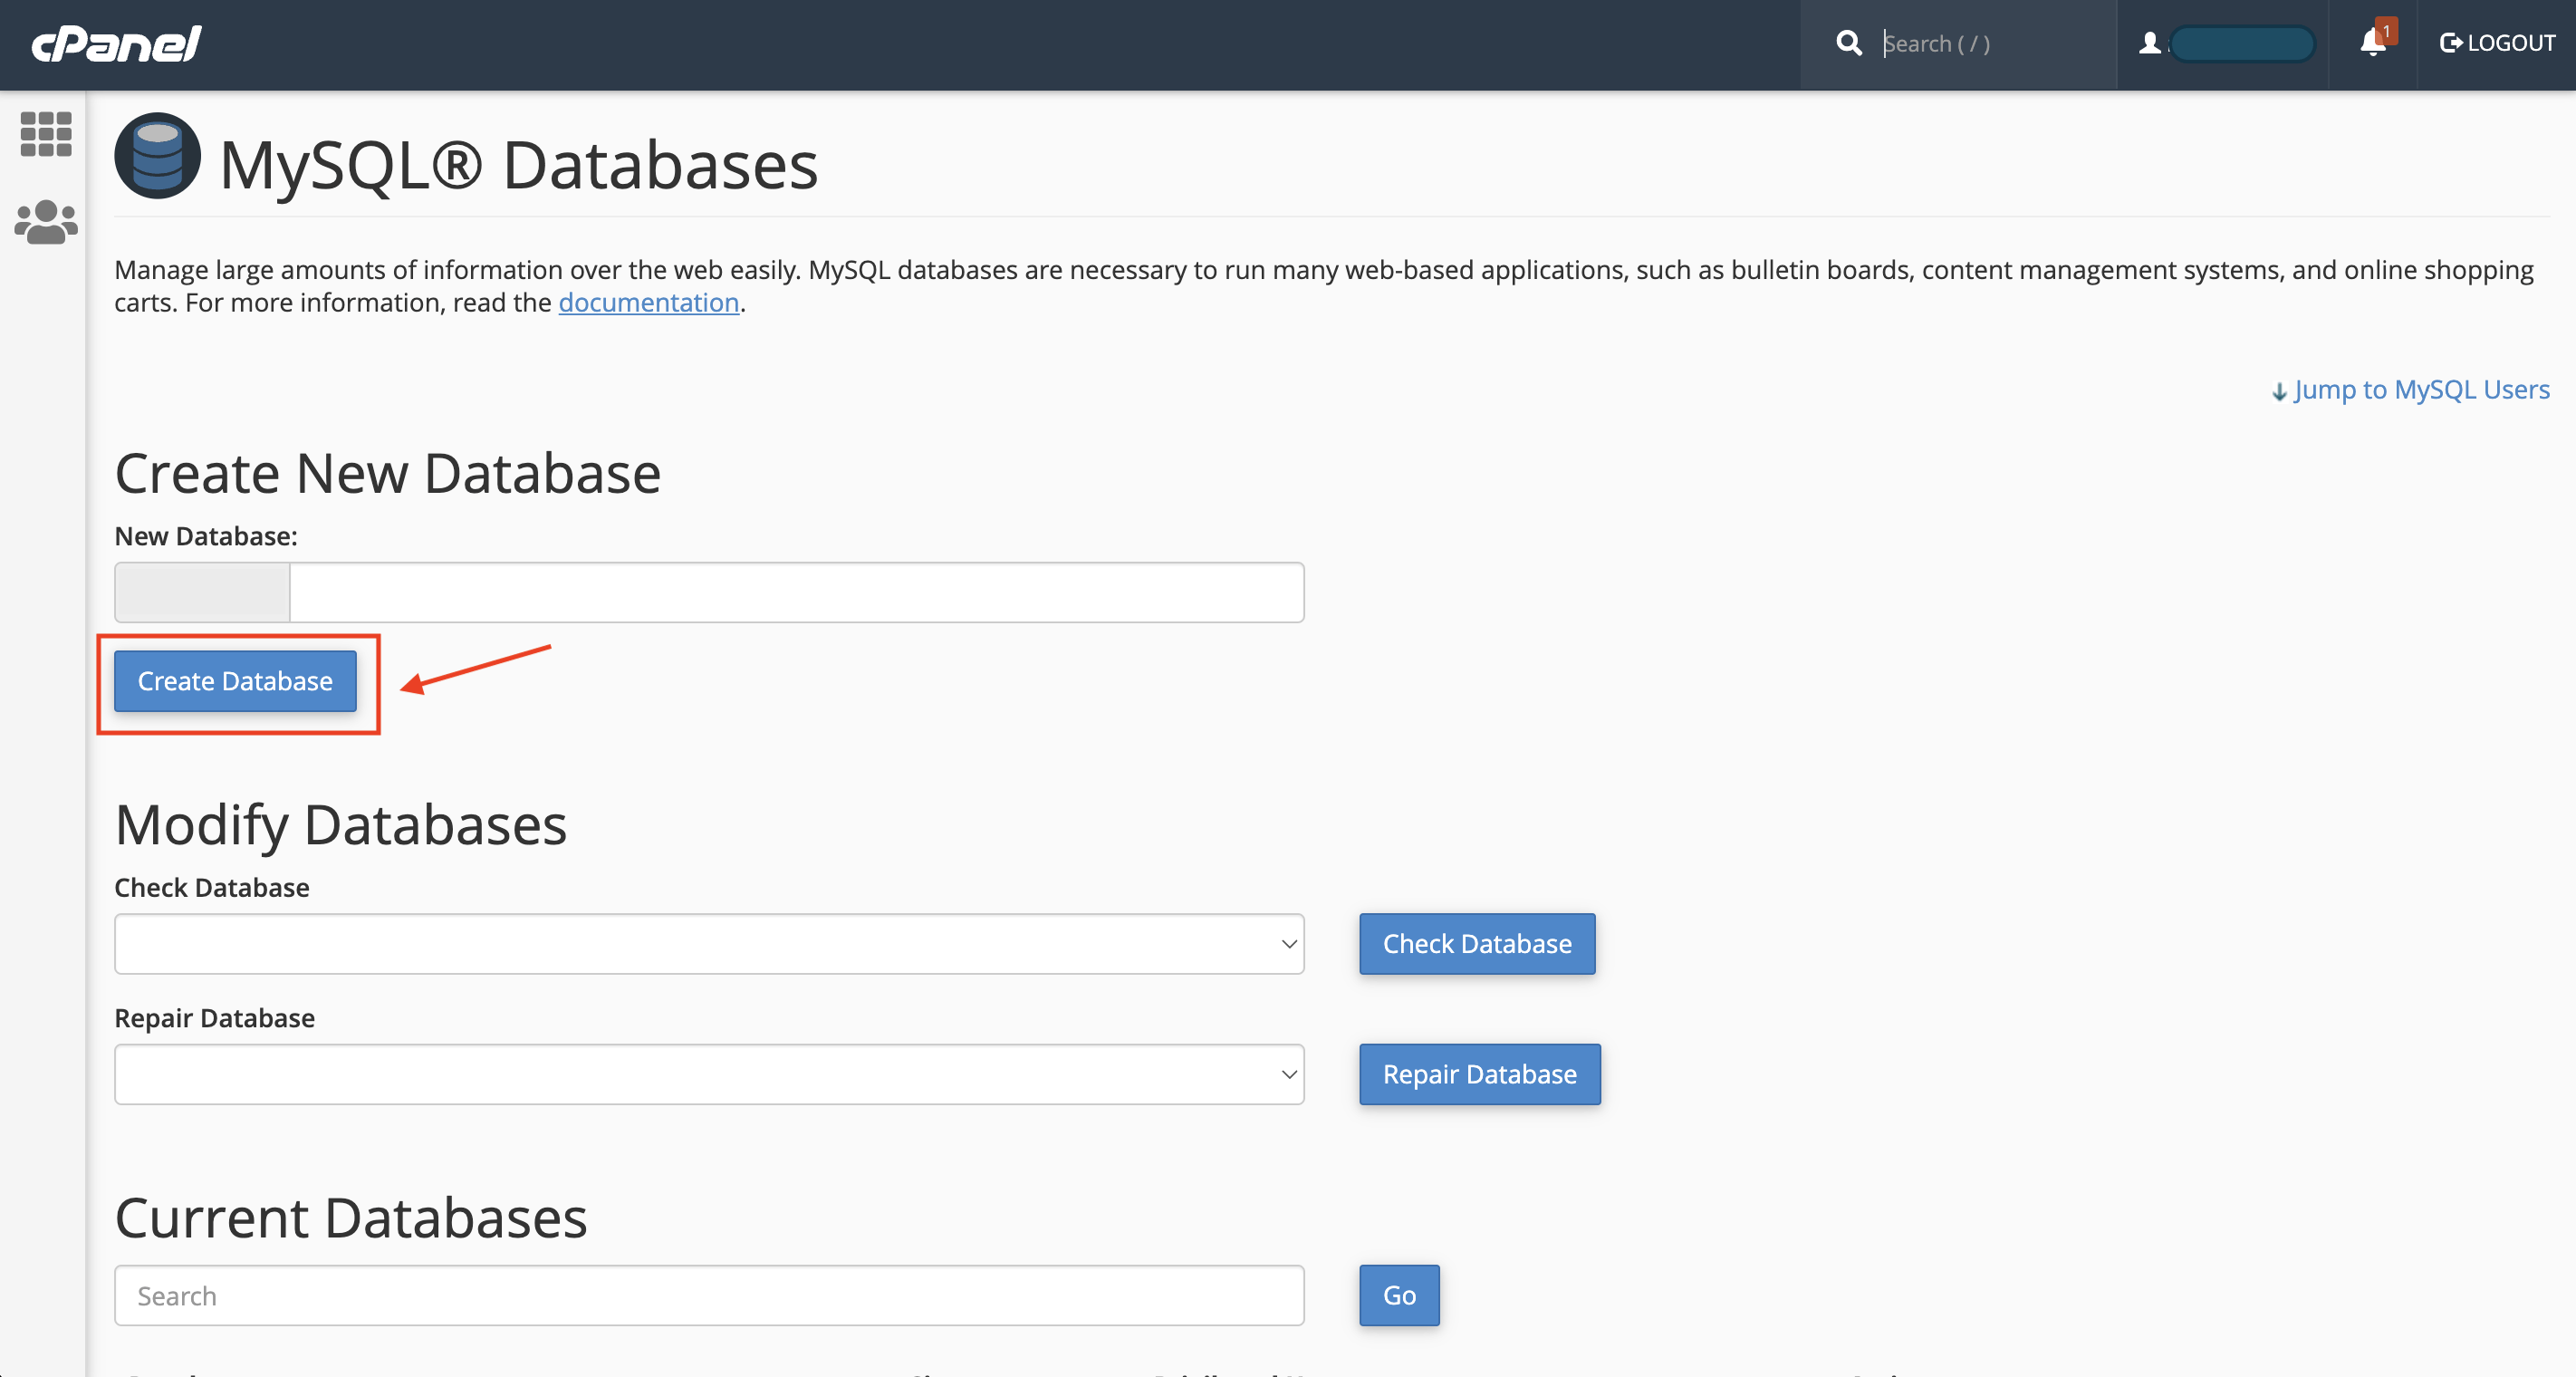
- Create a new database
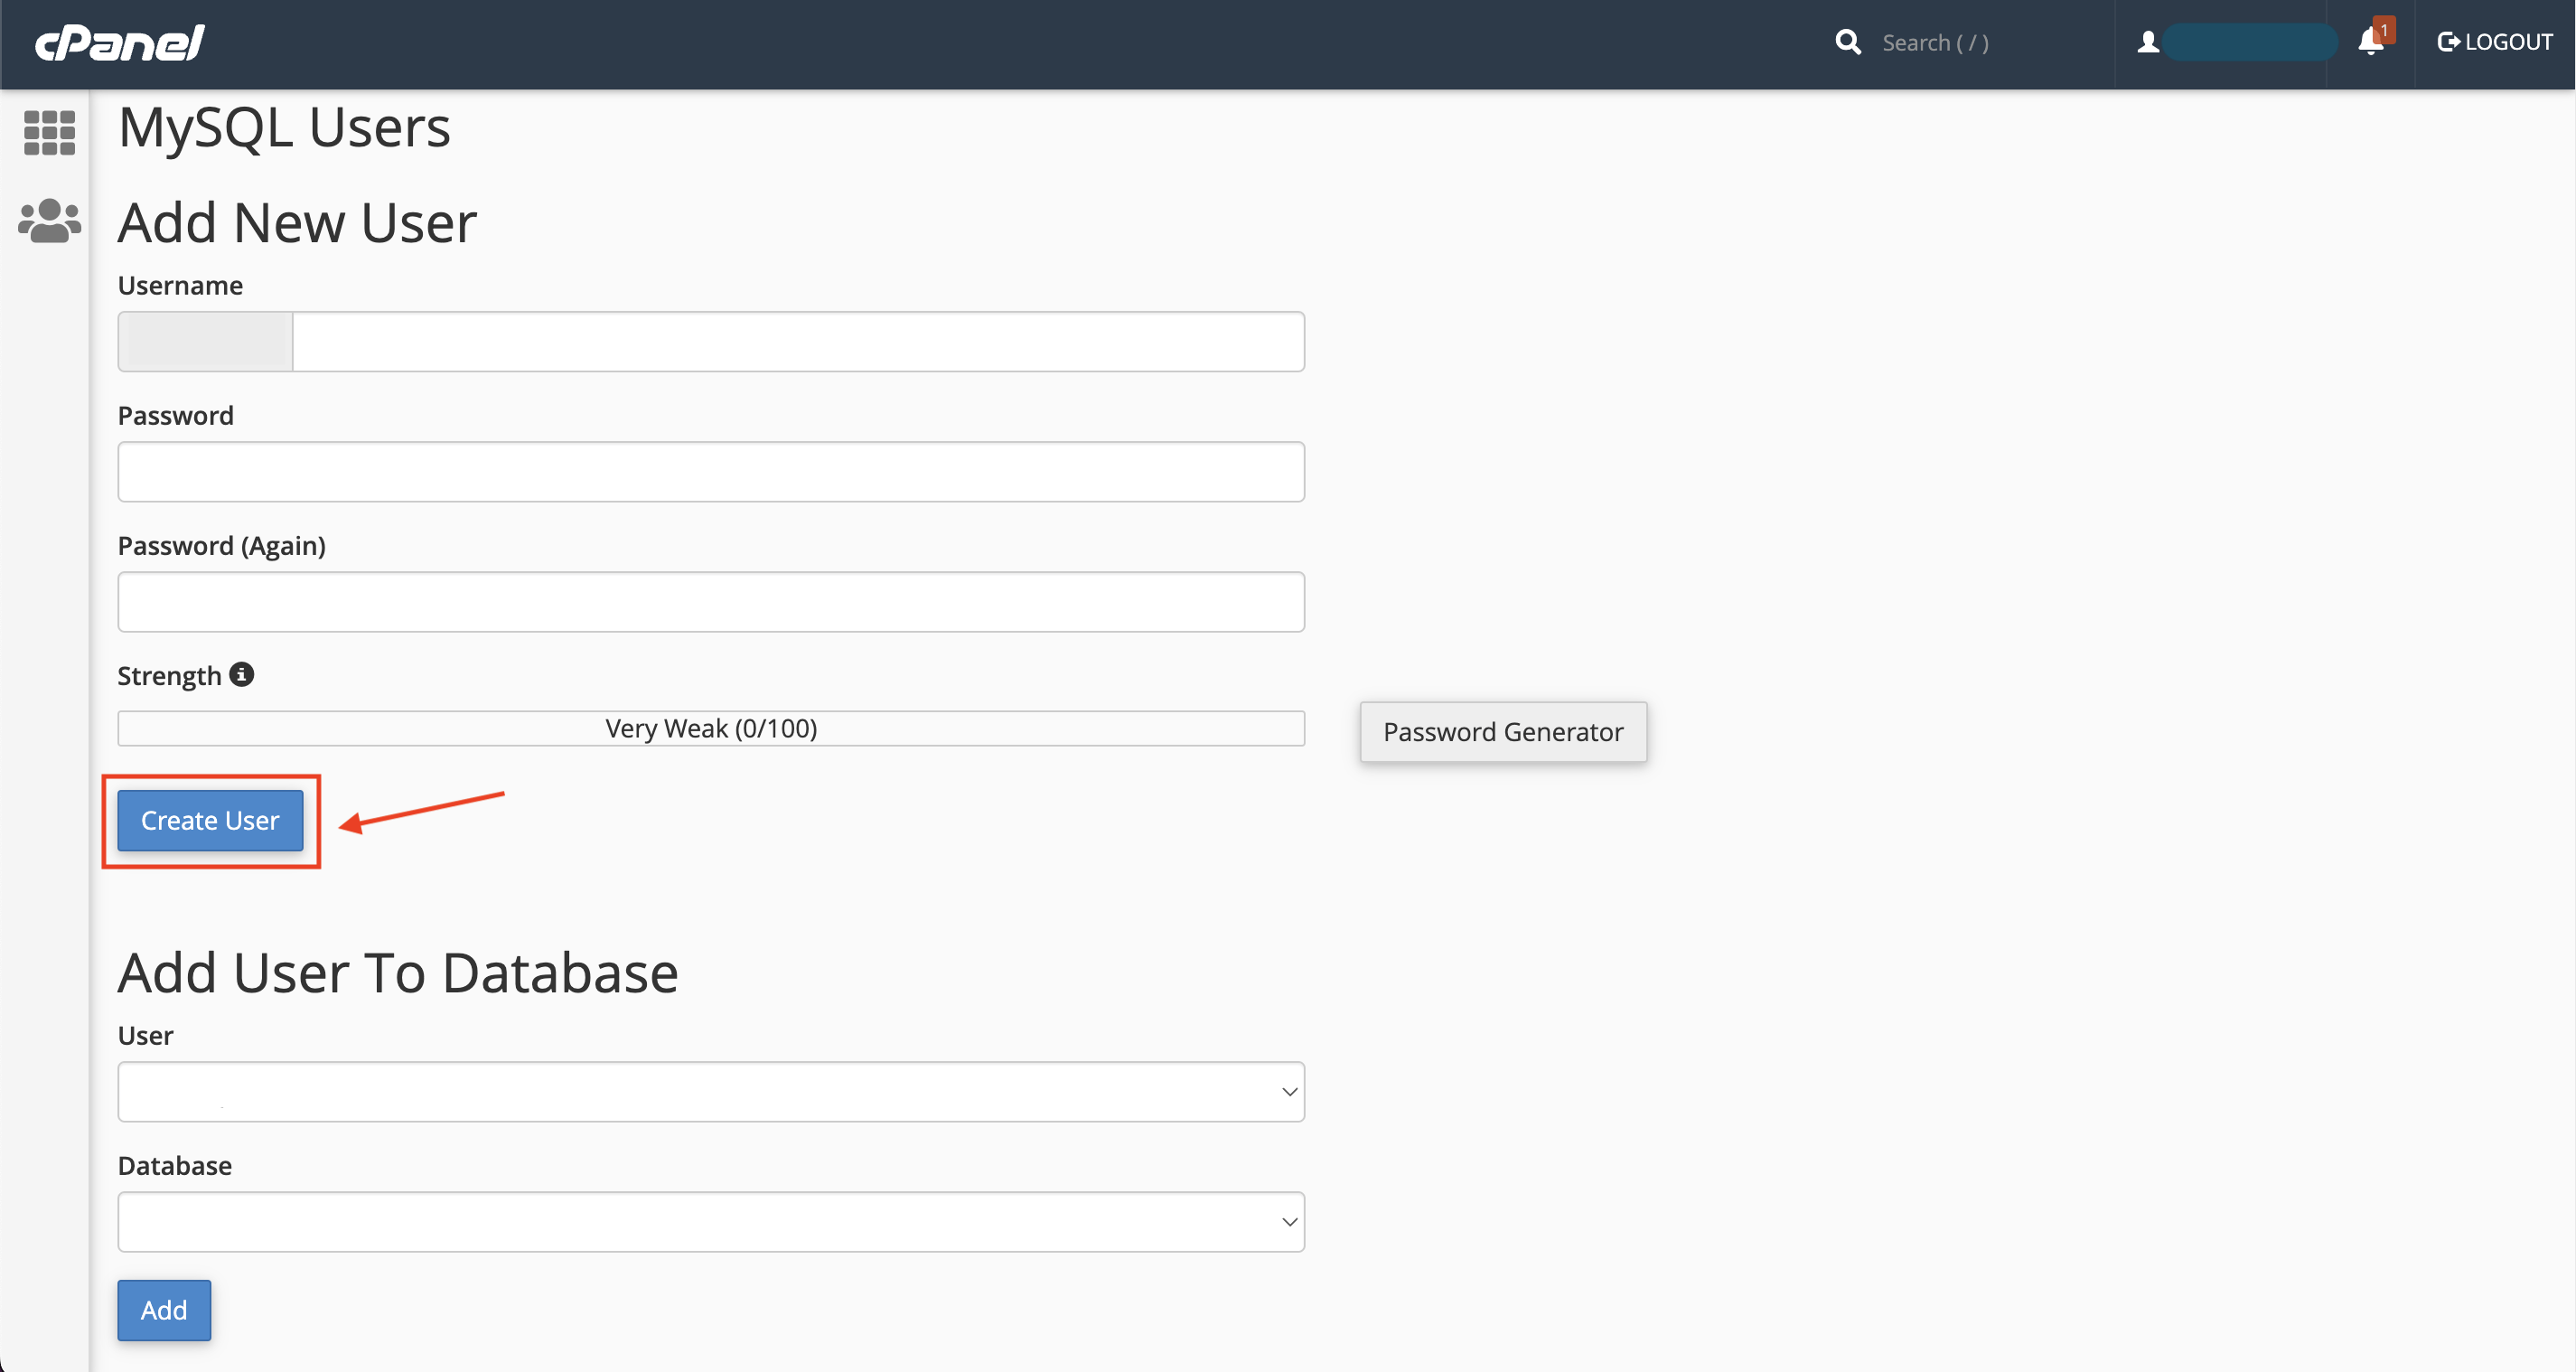
- Create a user for the database
- Add a user to the database
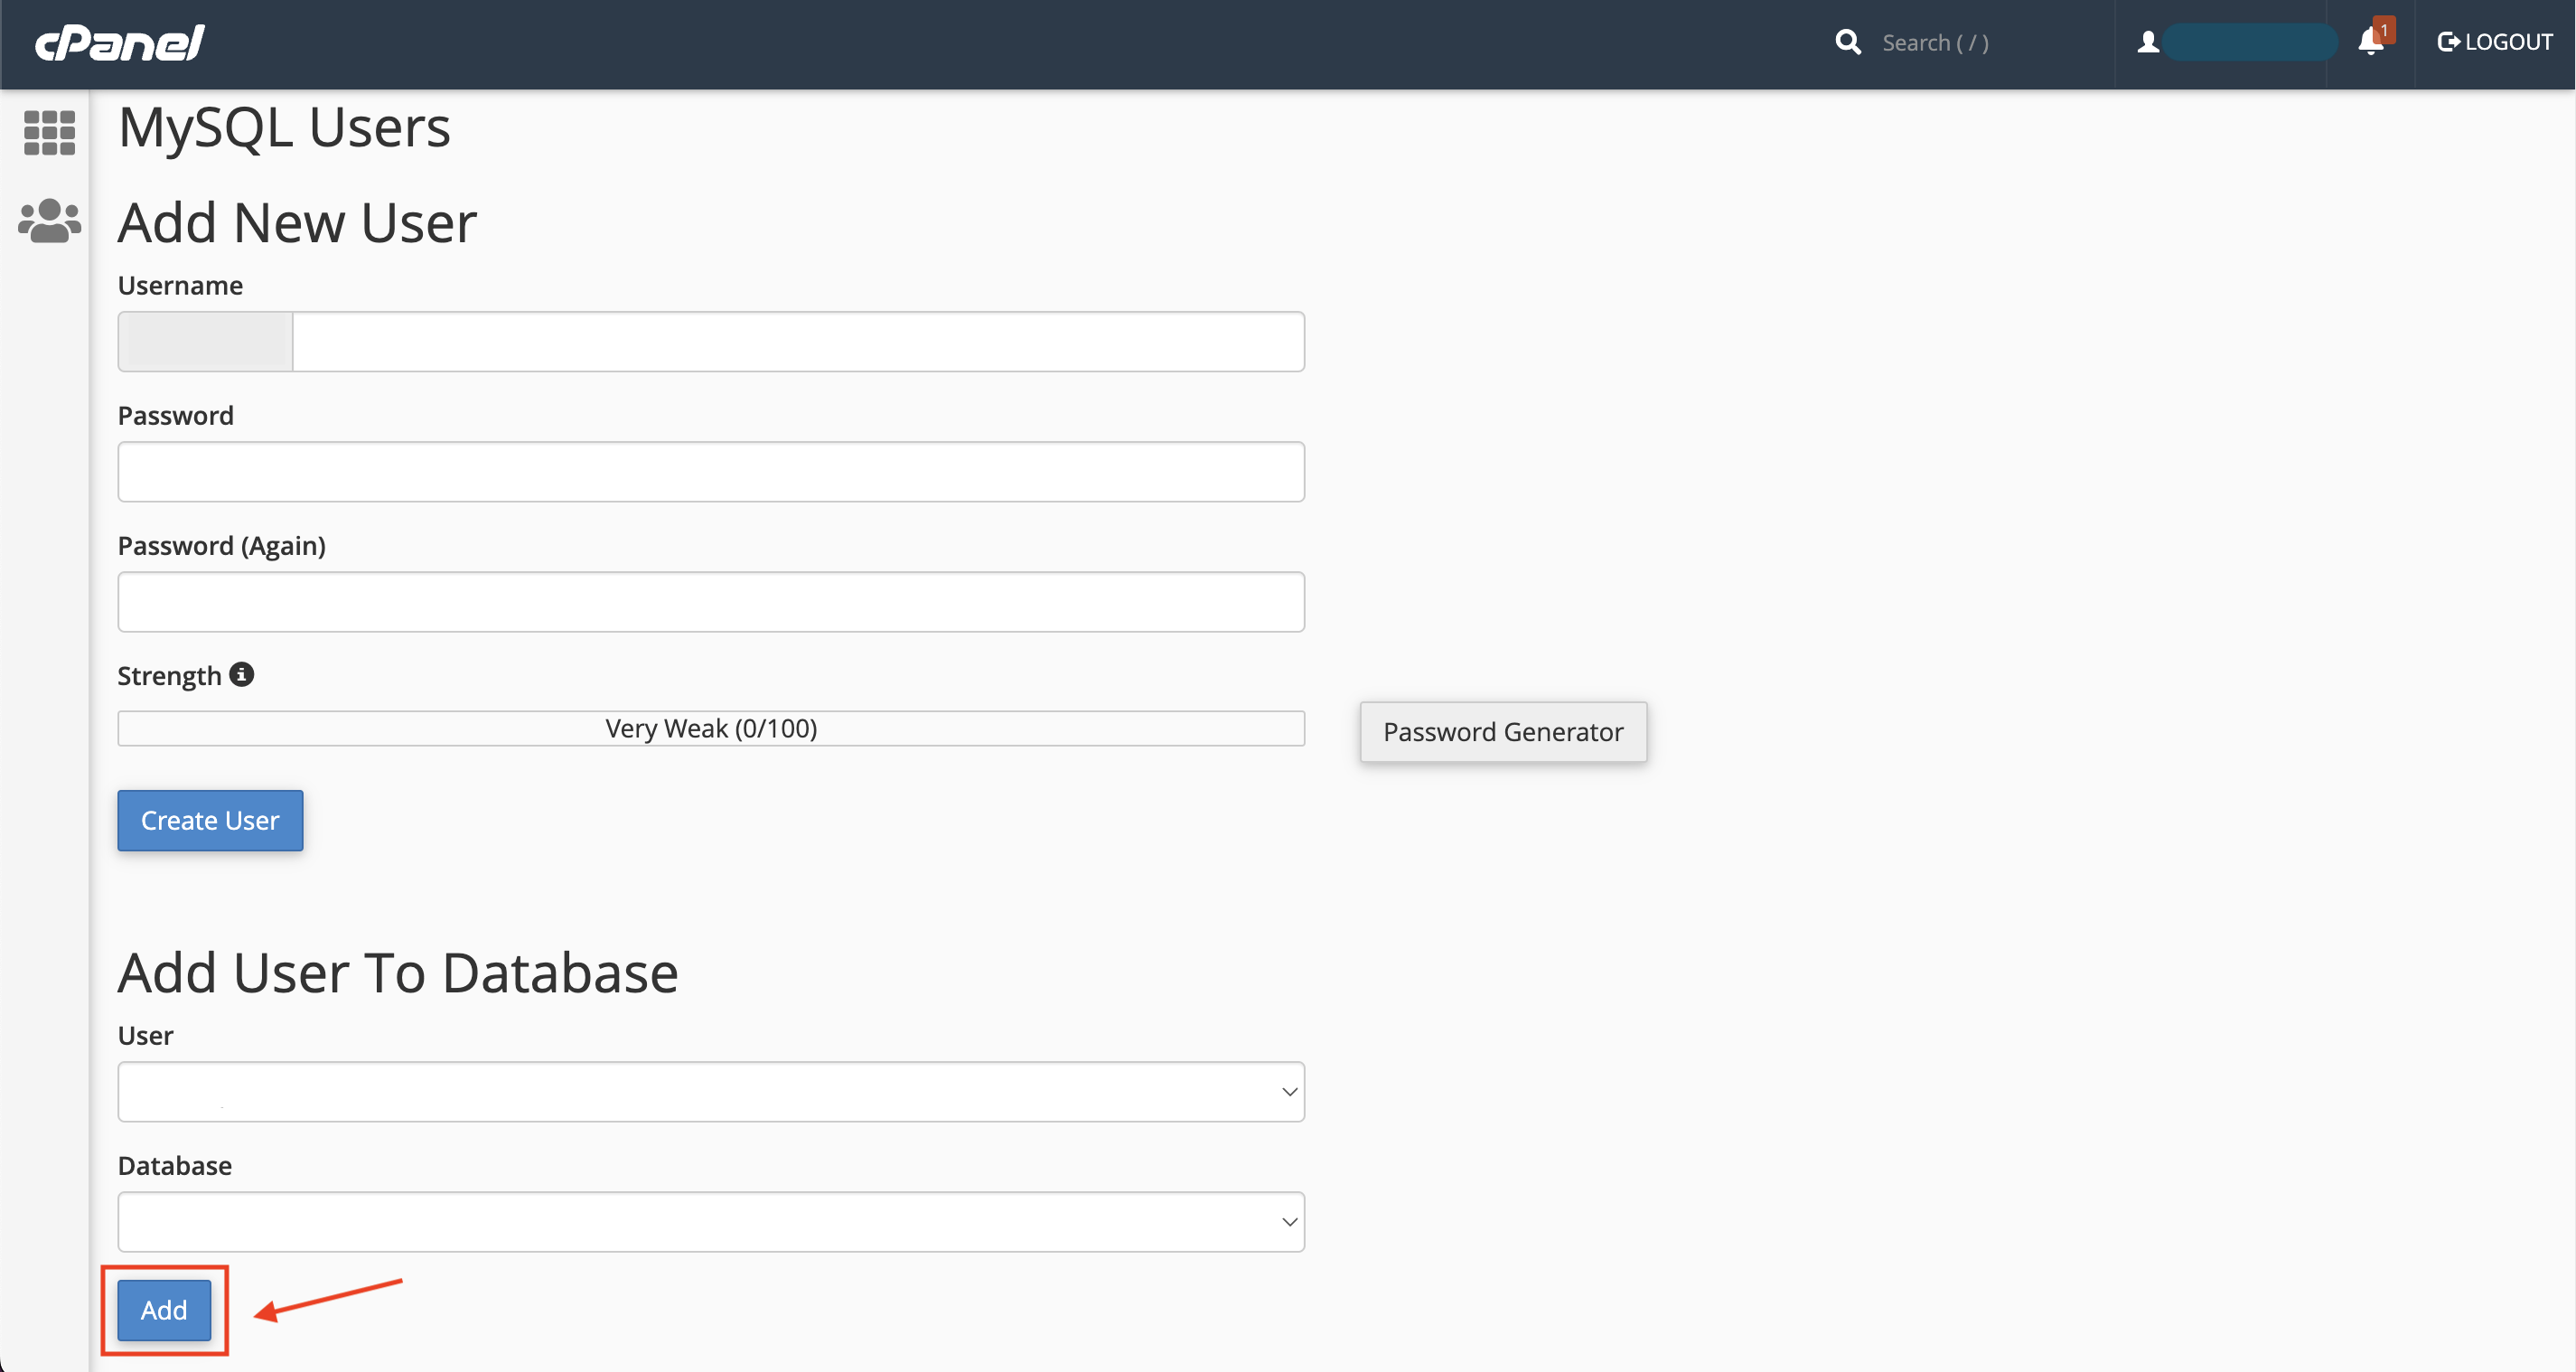
- Give privileges to the user
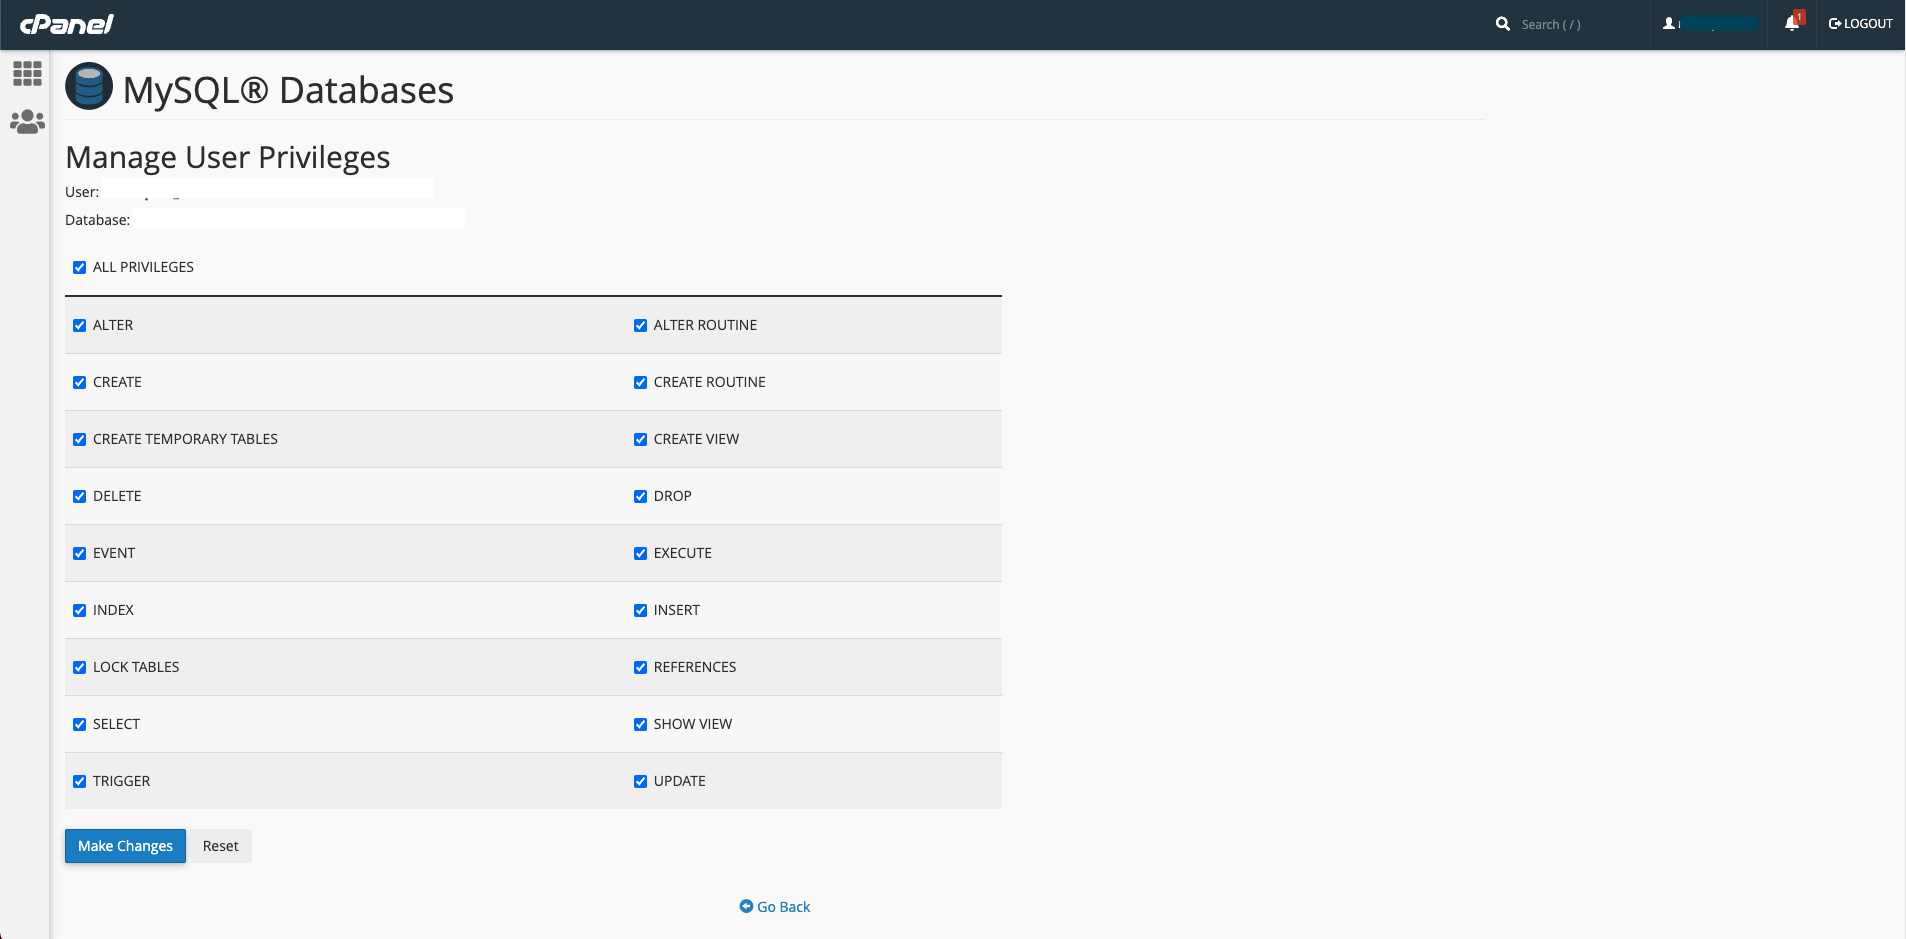
- From cPanel Go to MySQL Databases
Installation
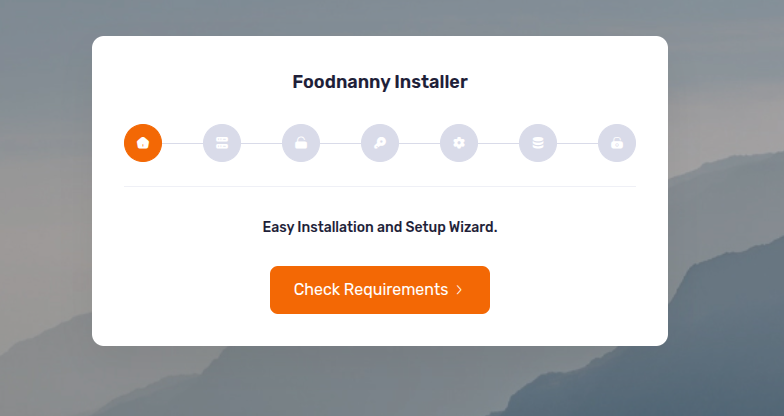
- Run the install script path from any web browser (http://yourdomain.com/install) and
click on “Check Requirements” button.
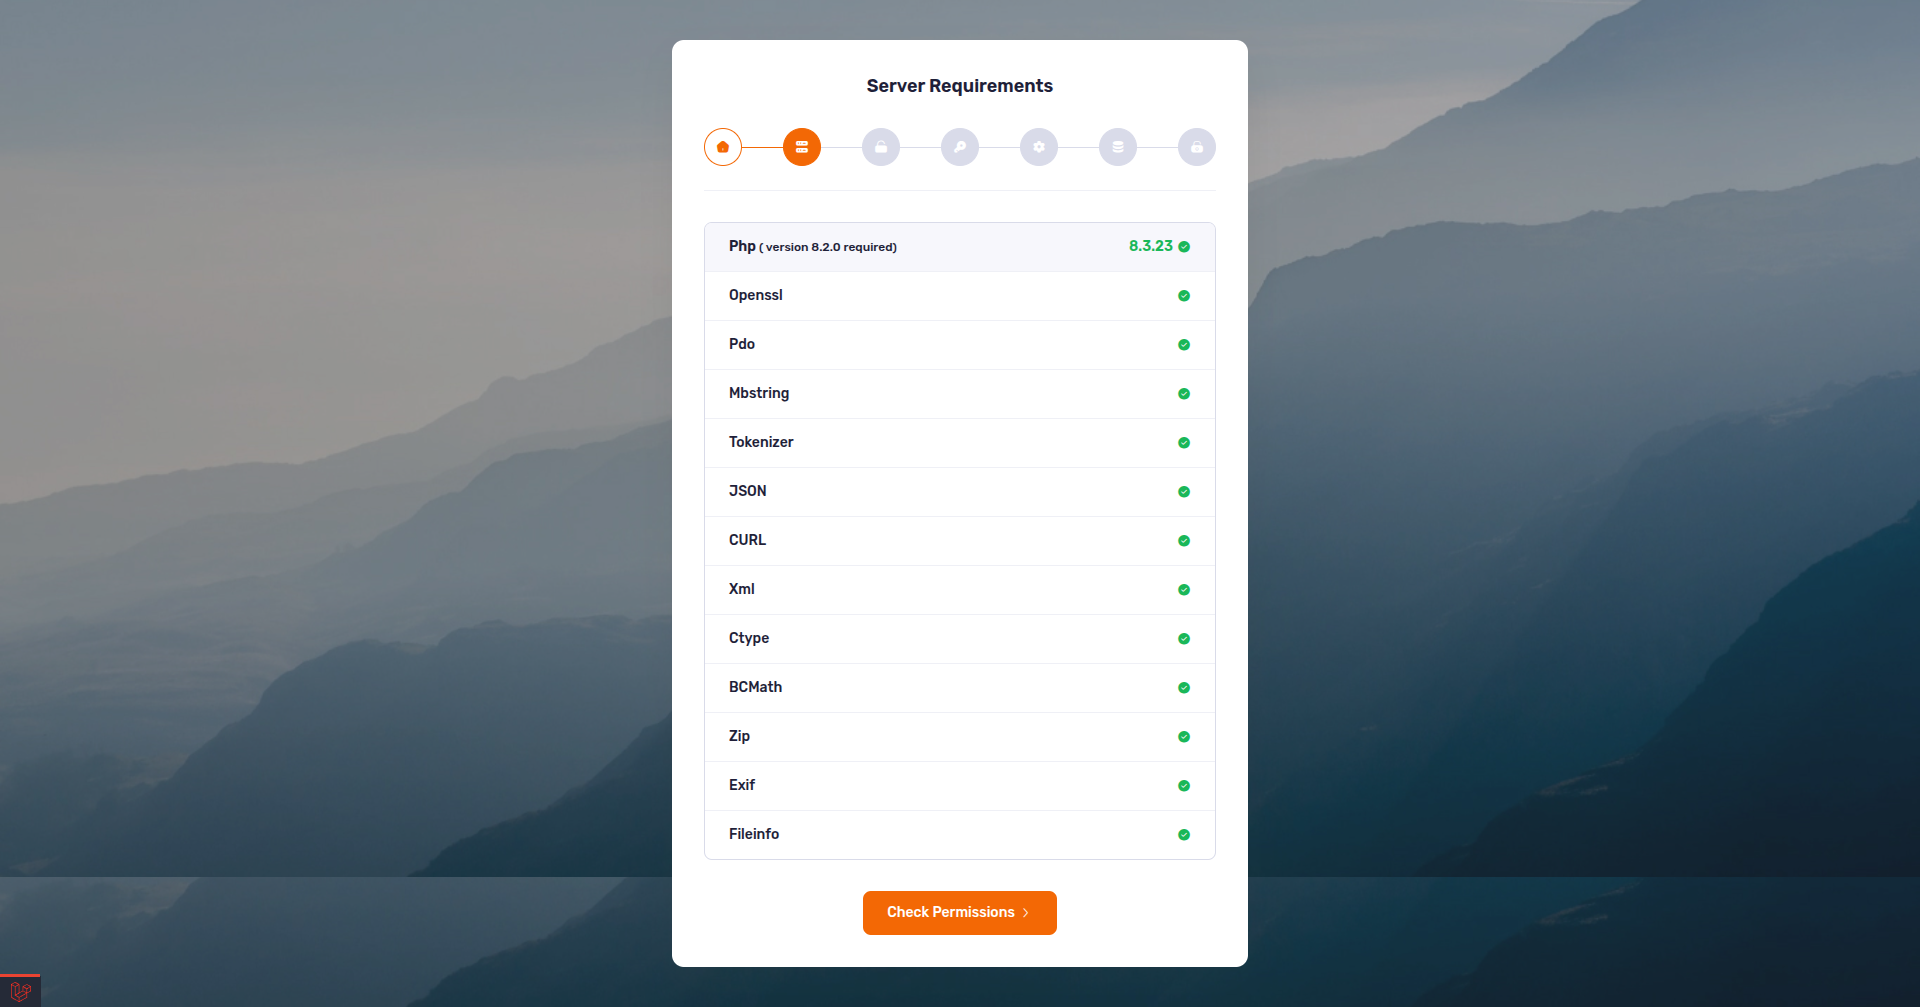
- Now you can see your php extension list if it is already installed in all extension then you can see
"Check Permissions" button. Now click on this button and go to next step
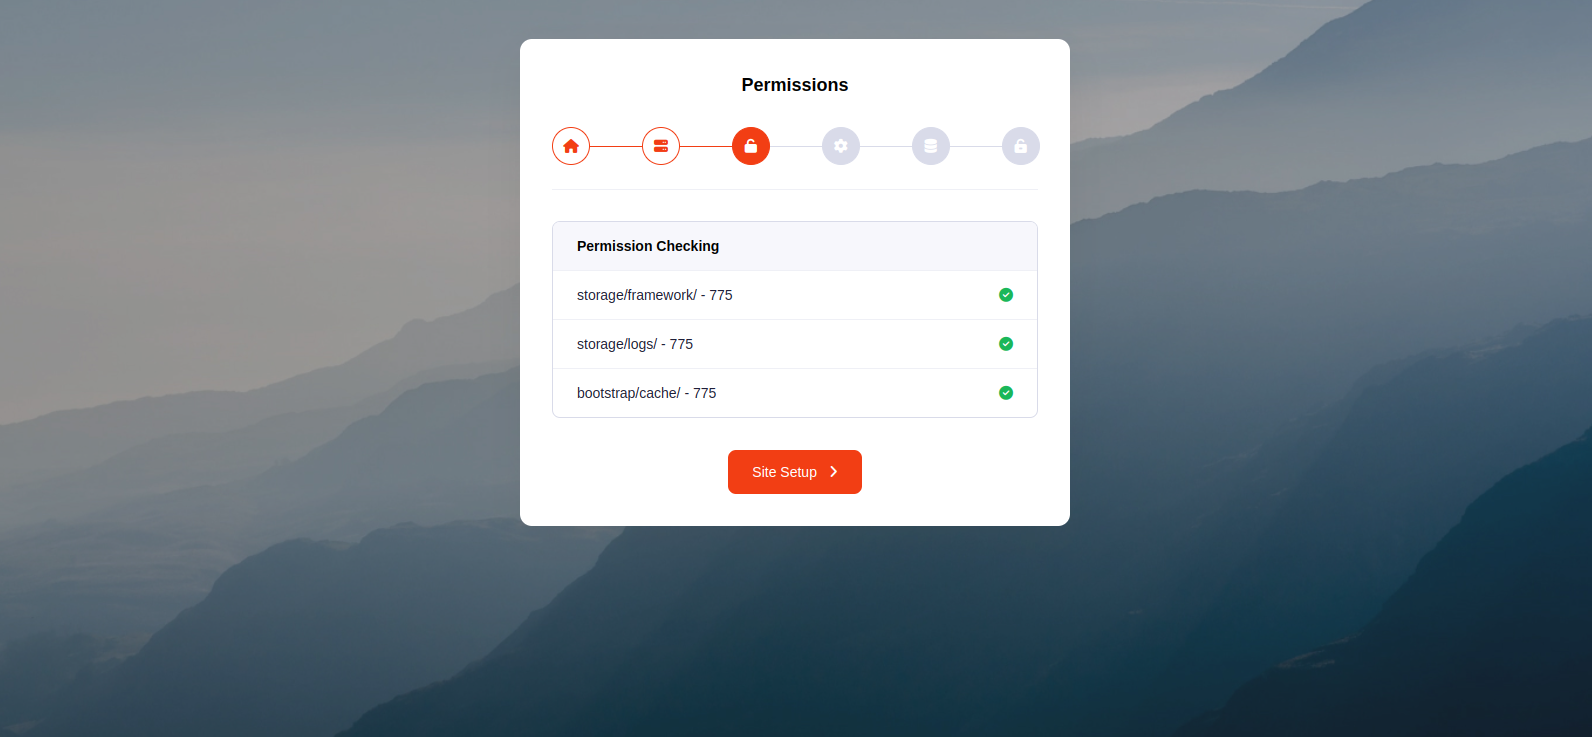
- Now you will see the folders permission list if everything is ok then click “License Setup”
- Provide your License Code, then click “Site Setup”
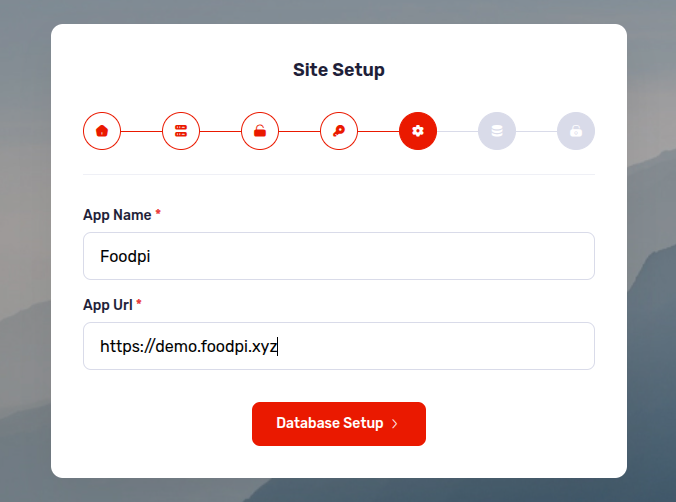
- Provide your App name and Domain name as App Url, then click “Database Setup”
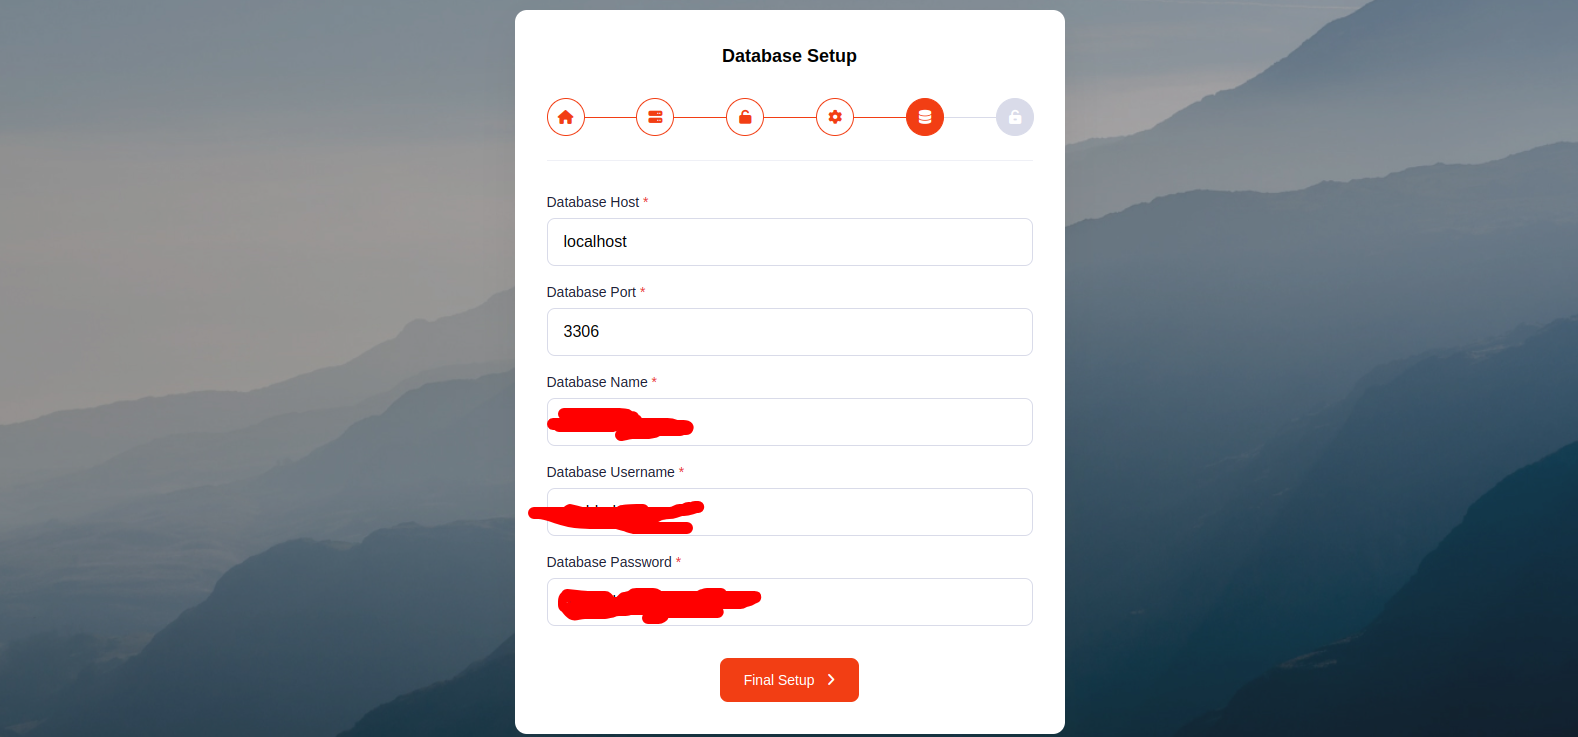
- Provide your database information like Database Host, Database Port, Database Name, Database Username,
and Database Password, then click “Final Setup”. Don't use # in your Database
Password.
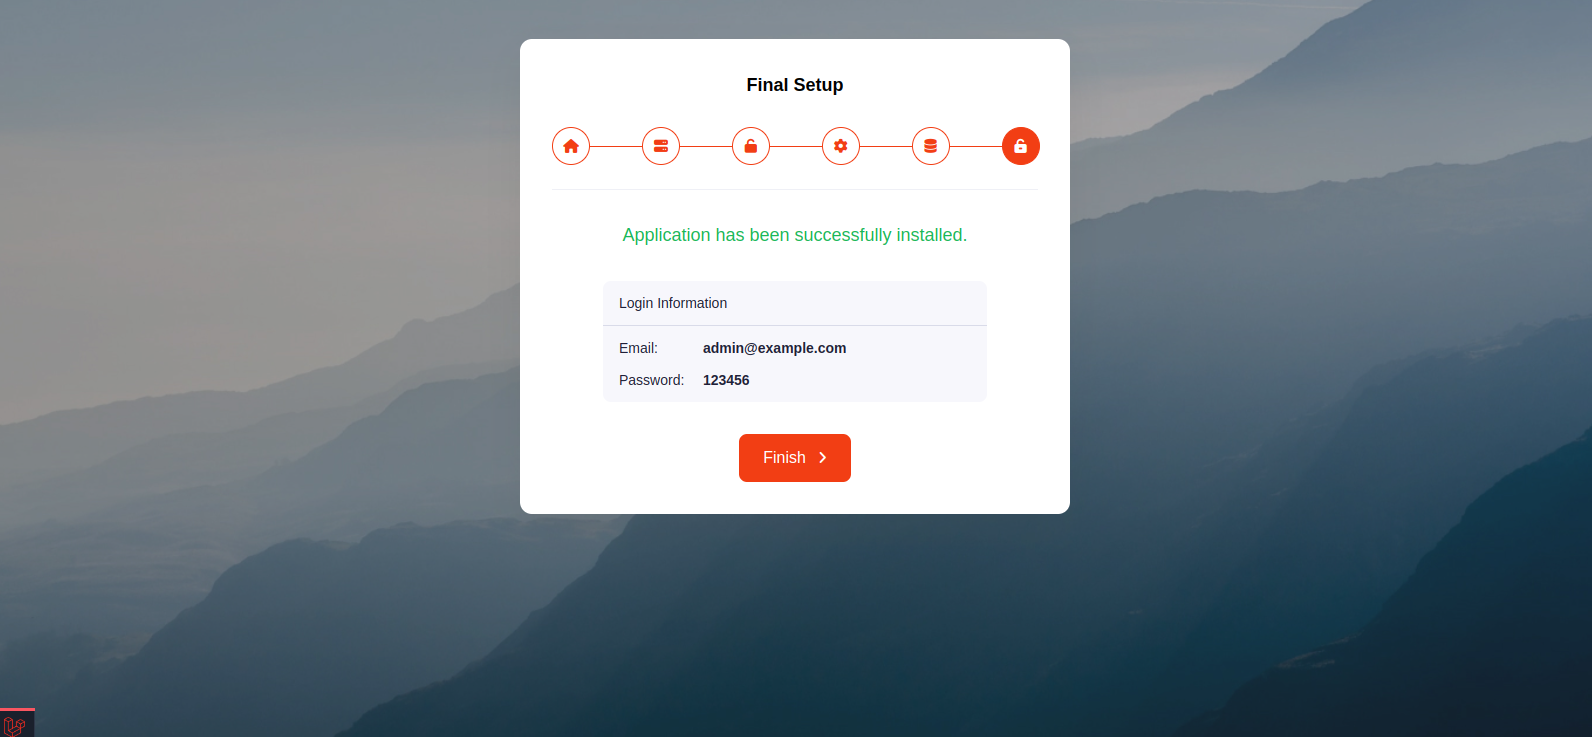
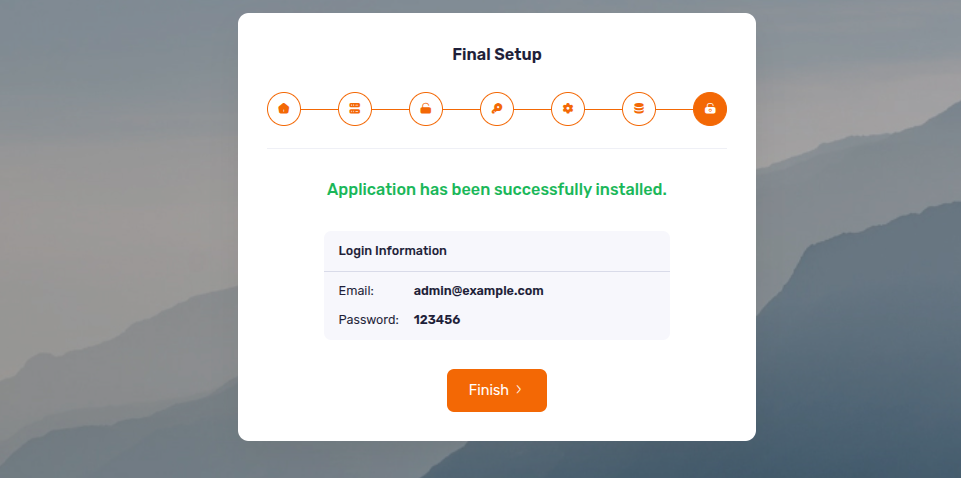
- Now you will see the login information (Email : admin@example.com, Password : 123456) then click
“Finish” to exit
- Good Luck!!!

Tips Check our video tutorial! Watch Now
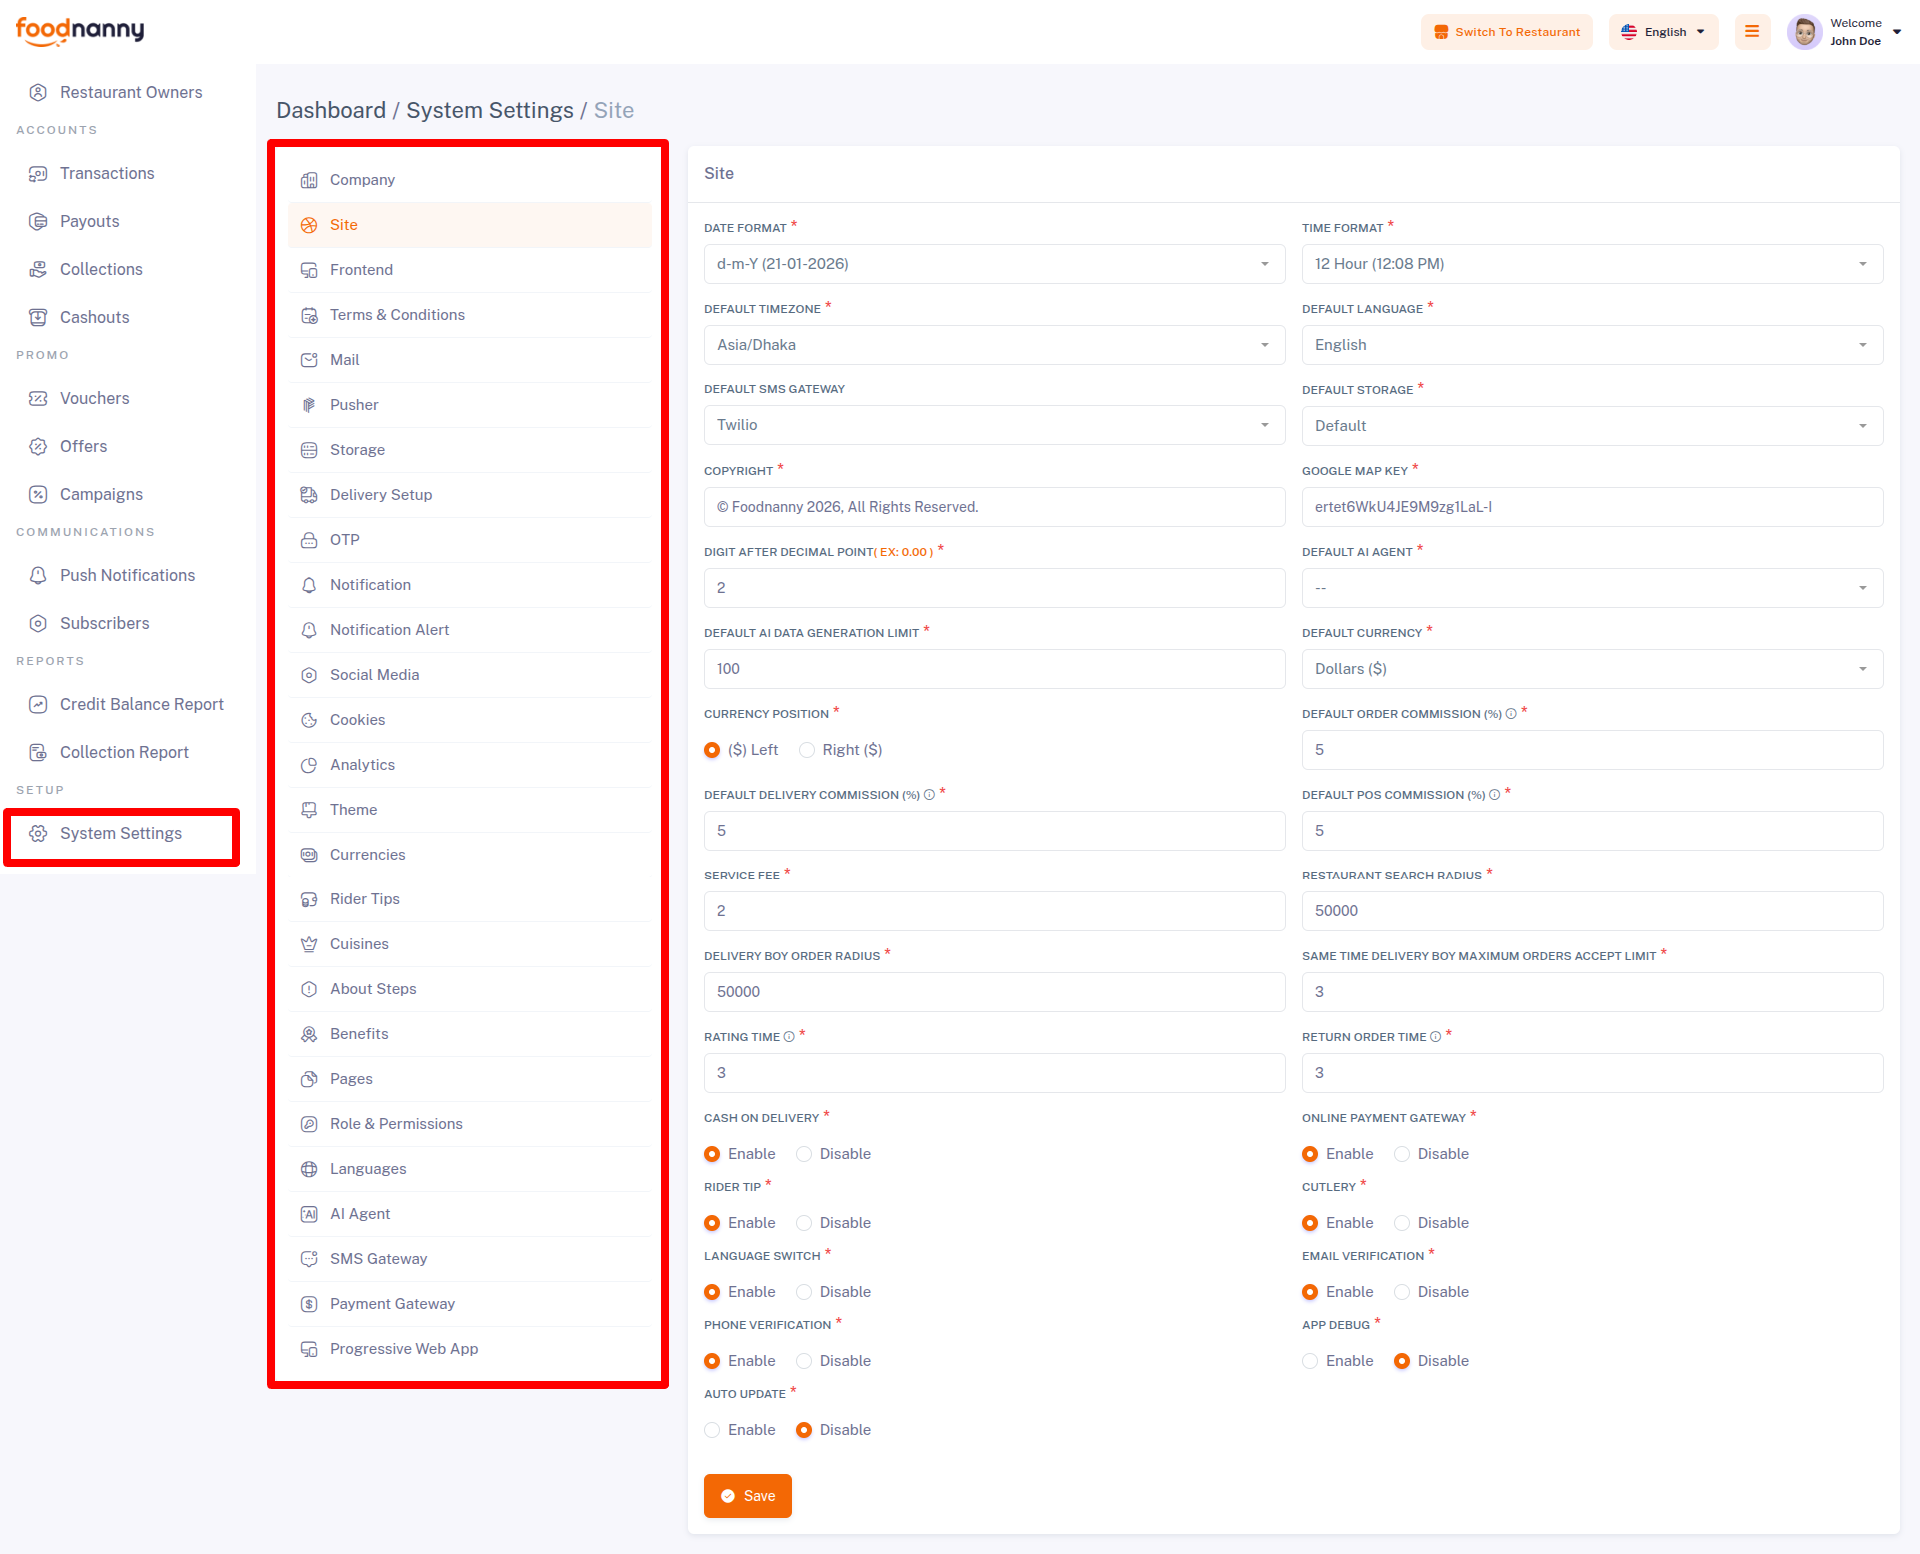
Within the administrative panel, we provide a designated section known as "System Settings." This particular area empowers you to configure various essential aspects of your business, such as your Company, Site, Frontend, Terms & Conditions, Mail, Pusher, Storage, Delivery Setup, OTP, Notification, Notification Alert, Social Media, Cookies, Analytics, Theme, Currencies, Rider Tips, Cuisines, About Steps, AI Agent, Benefits, Pages, Role & Permissions, Languages, SMS Gateway, Payment Gateway.
Tips Check our video tutorial! Watch Now
AI Assistant Setup & Usage Guide
1. AI Assistant Configuration
Step 1: Get an OpenAI API Key
- Visit the OpenAI Developer Platform and log in.
- Go to the API Keys section and click "Create new secret key".
- Copy the key immediately. ⚠️ Important: The key is visible only once. Store it securely.
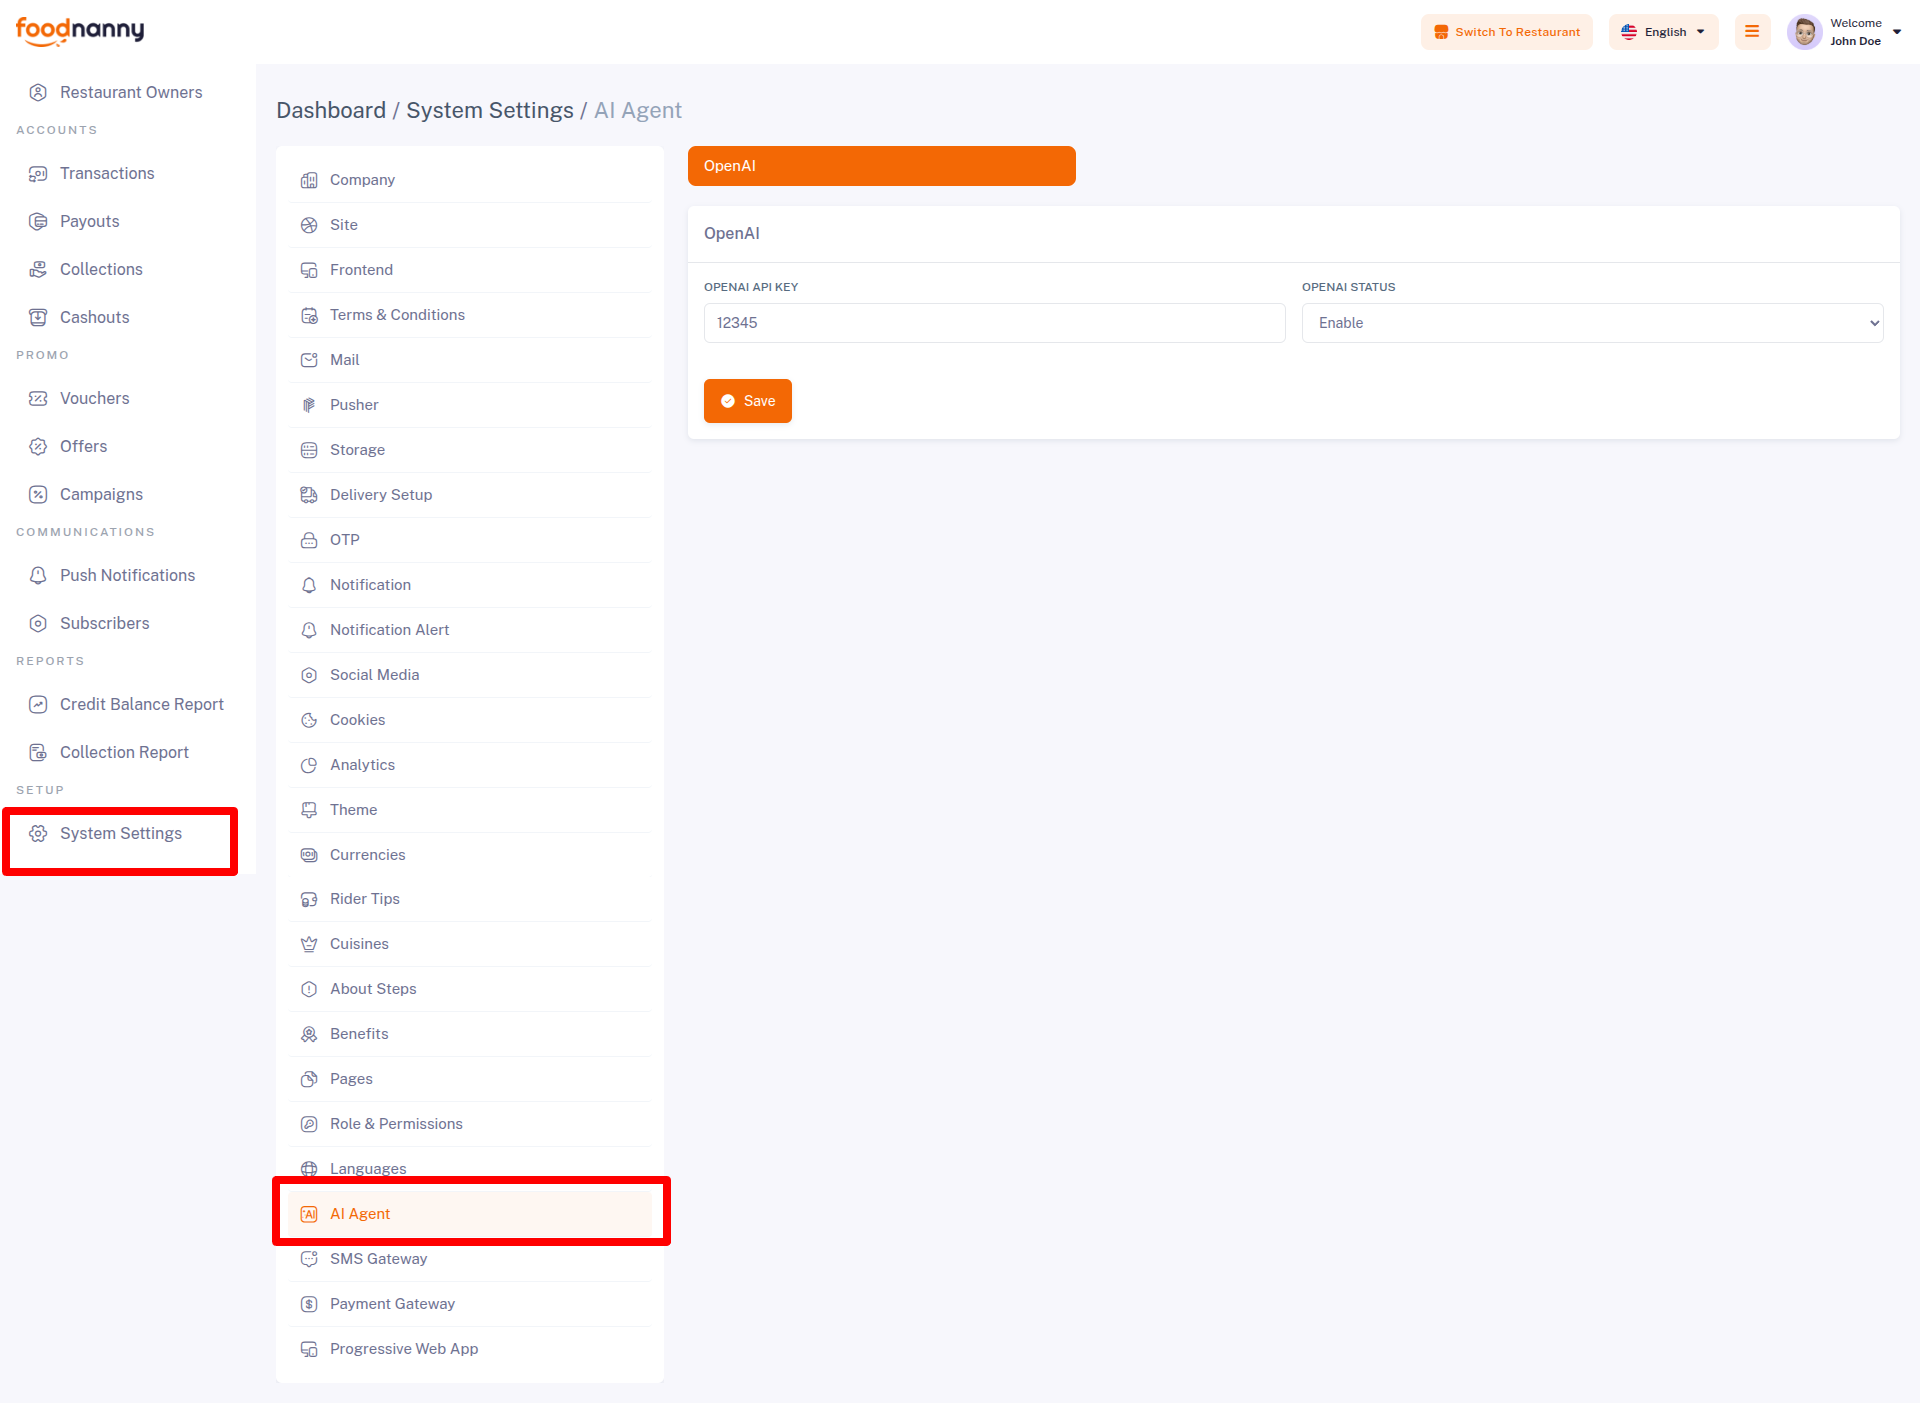
Step 2: Backend Configuration
Navigate to Admin Panel → System Settings → AI Agent. Enter your API Key in the field and click Save.
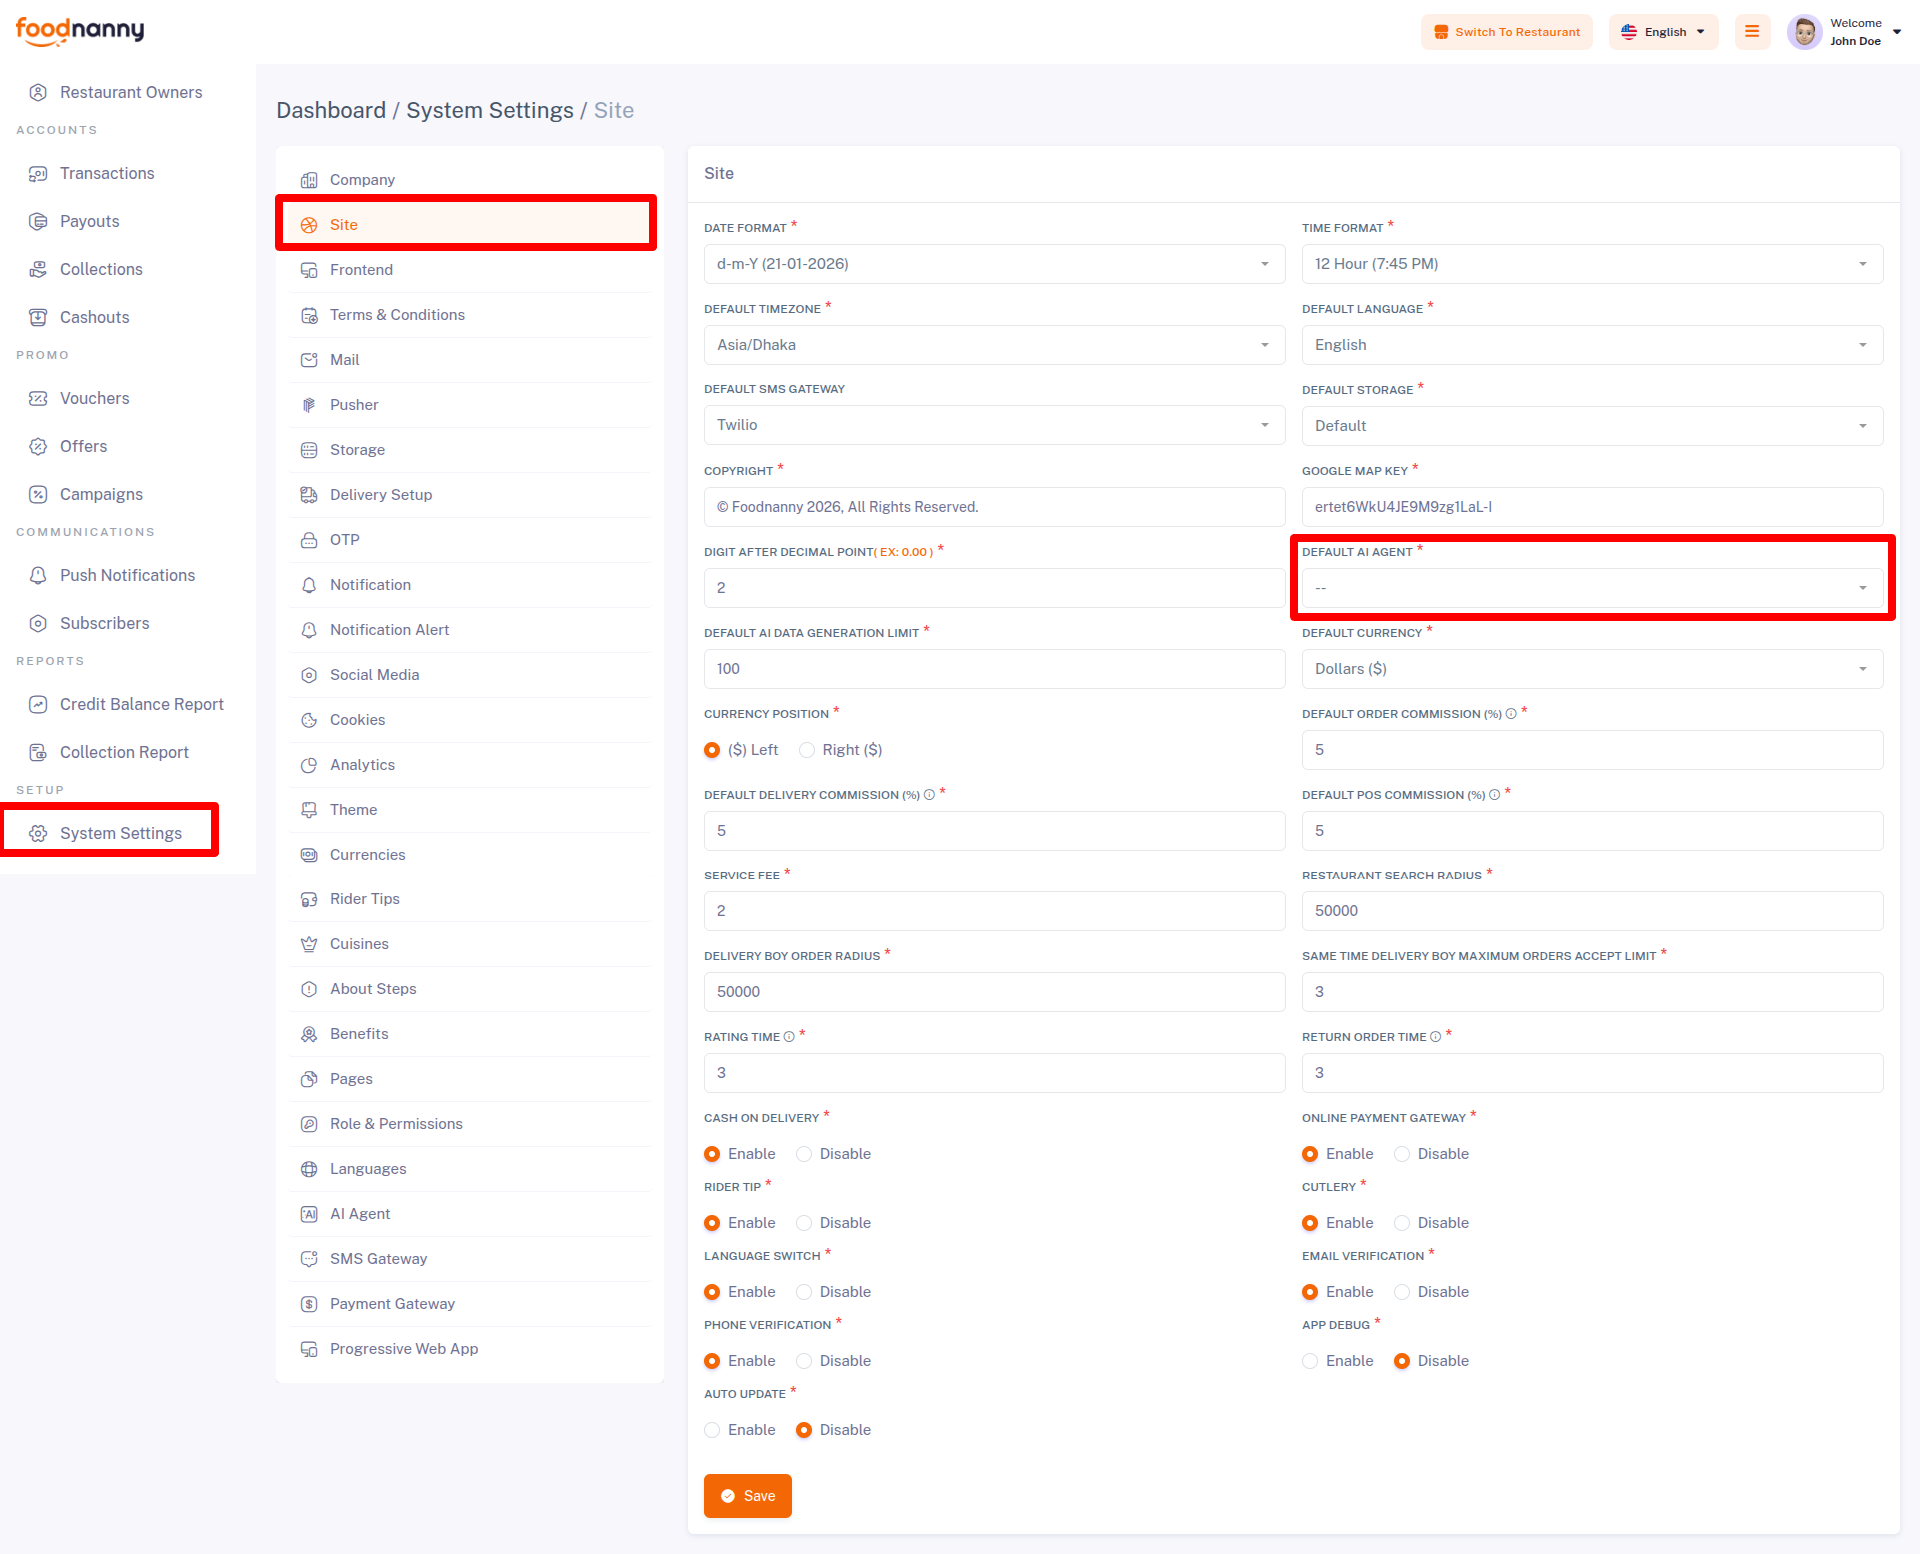
Step 3: Enable Default Agent
Go to Admin Panel → System Settings → Site Settings. Under the "Default AI Agent" dropdown, select your preferred agent and save.
2. How to Use AI Features
Once configured, Restaurant Owners can access the AI features from their respective panels. A smart AI Helper icon will be available on the right side of the dashboard.
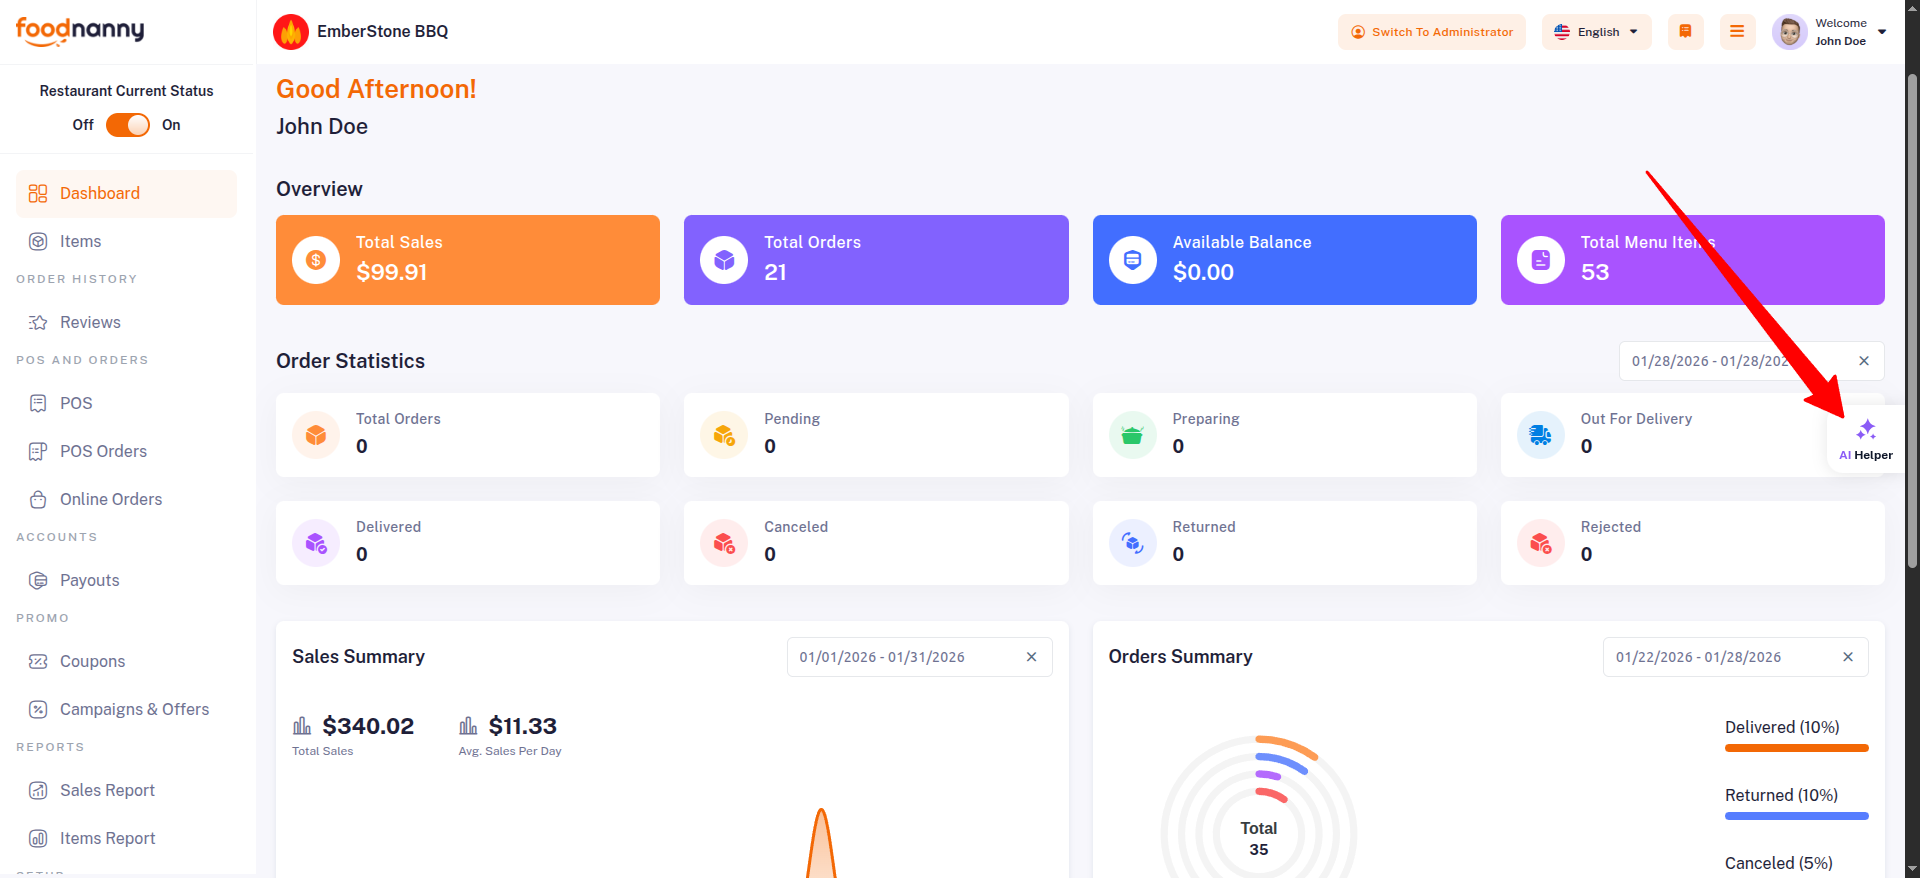
Clicking this icon opens a dedicated AI Chat Interface. Owners can interact with the agent to get any help or suggestions.
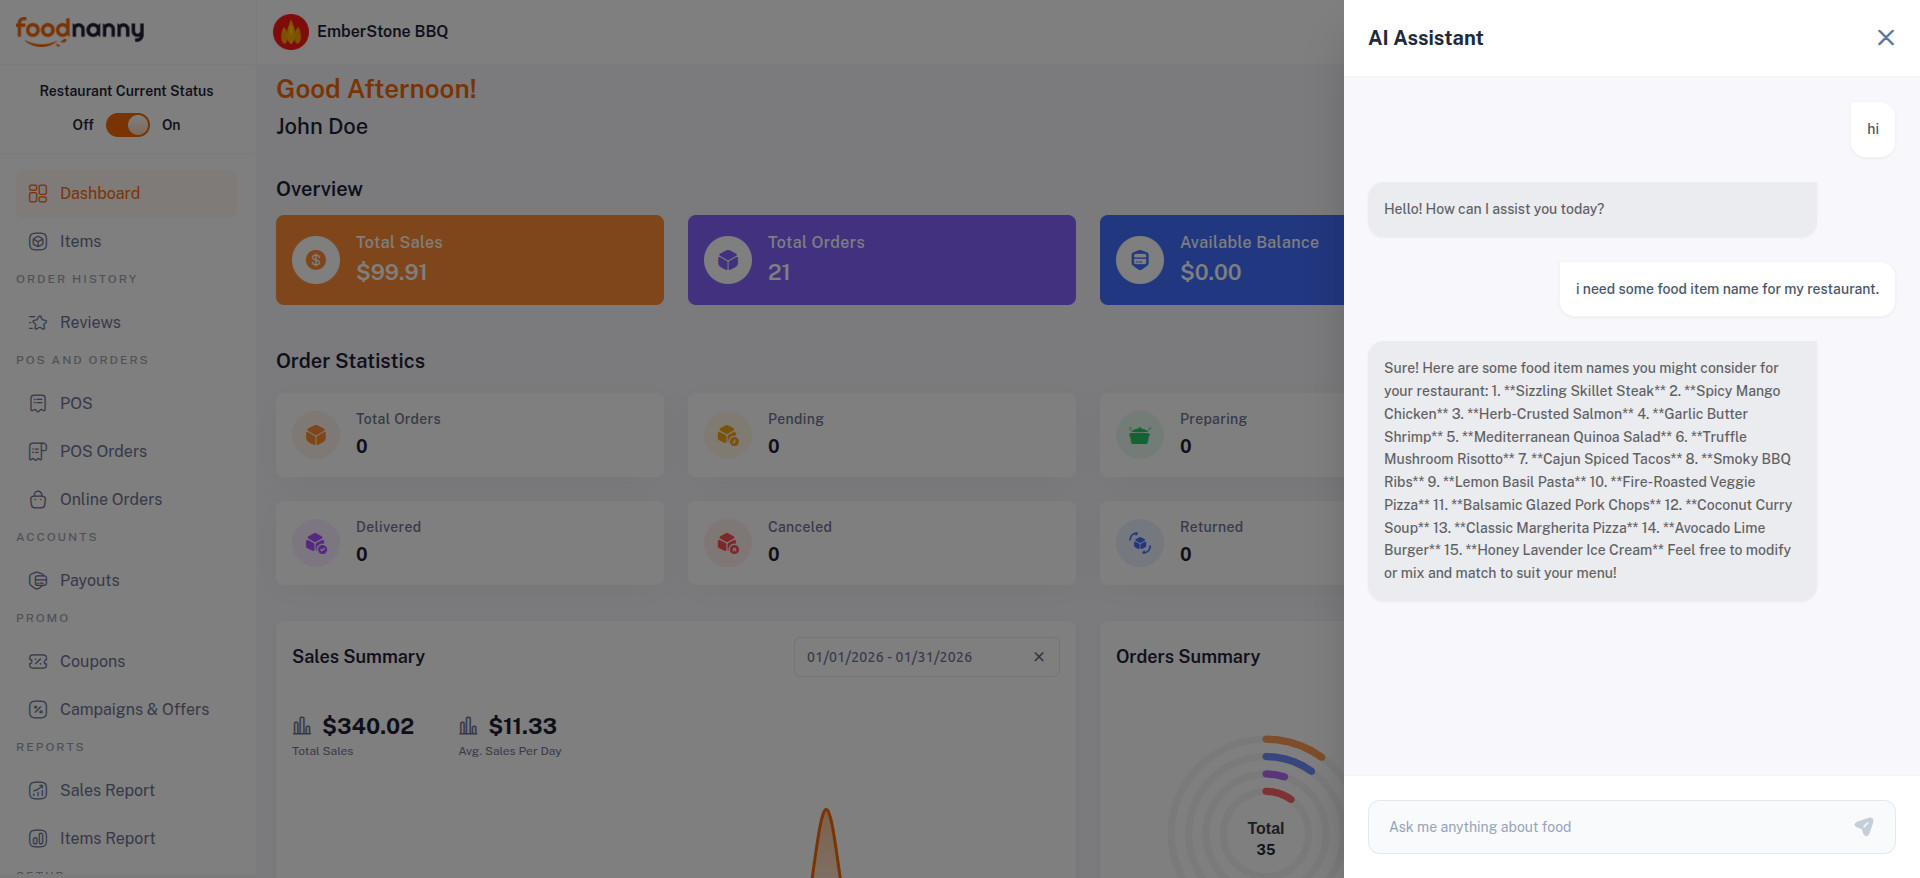
Additionally, the AI integration helps in streamlining menu management. Owners can use the AI to generate attractive Item Names and professional Descriptions during the creation or editing of food items.

Firebase Push Notification Setup
To use firebase follow the procedure which are mentioned below
- Go to this URL to create a project https://console.firebase.google.com/u/0/. If you already have a project, continue with that.
- Then go to Project Settings and create an app.
- In Project Settings > General > "your created app", you will find apiKey, authDomain, projectId, storageBucket, messagingSenderId, appId, measurementId.
- Click on "Cloud Messaging". There you will find a button named "Generate key pair". Click it to get the KEY PAIR.
- Now in Project Settings, click "Service Account". There you will find a "Generate new private key" button. Click this button to get a JSON file.
- Then go to your "foodnanny" admin Dashboard > System Settings > Notification. Enter your credentials and save them.
- Now it's done.
Tips Check our video tutorial! Watch Now
How to configure multiple languages?
Translate your admin and website, follow these steps:
- Login into the admin panel.
- Go to System Settings -> Languages.
- Click On Add Language.
- Fill all field and add new language.
- Click on the view icon of the new language low in from the list.
- Select file from the dropdown option under Files tab and click get file content.
- All the lebels and language objectives will appear in the bottom of the field.
- Now update the value of all the input fields and click save.
- You do not change any word under the curly bracket text {}, example
{name}. - When all language is changed then run some command in your terminal or ssh panel.
npm install
npm run build
Prerequisite
- IDE (Android Studio or Vs code. Vs code recommended)
- Ensure that you downloaded and install JDK 17 on your device.
- Flutter SDK setup (version 3.38.7 stable)
- JDK17 with path setup
- Xcode 26.2 for IPA file build
- Supported platform Android, ios
Initial Configuration
Run an existing flutter project on IDE
- Open your vs code.
- Go to your project folder location.
- Now drag and drop your project folder on vs code.
- In the terminal write "flutter pub get" command and wait for some moment.
- Go to "pubspec.yaml" and press (CTRL+S) for saving.
- Now open your emulator and select.
- Run your project.
Tips Check our video tutorial! Watch Now
Change App Logo
- Go to the project folder.
- Go to the “to assets/icons” folder.
- Find the “app-logo.svg” file and replace it with your logo file.
- Your logo name must be the same and file format must be in svg.
- Now restart your app and done.
Tips Check our video tutorial! Watch Now
Change App Icon
- Open your browser and go to ‘https://www.appicon.co/’
- Upload your app icon and click the generate button.
- Make sure your app icon must be in PNG format.
- For android unzip that file and copy the folder inside the android folder.
- For ios unzip that file and copy the folder inside the ios folder.
- For android open your project and go to ‘android/app/src/main/res/’.
- For ios open your project and go to ‘ios/Runner/’.
- Then paste it into that folder and restart your project.
Tips Check our video tutorial! Watch Now
Change App Name
-
For Android Change the value of label from
<project>/android/app/src/main/AndroidManifest.xmlandroid:label="My App Name" -
For IOS Change the value of CFBundleName from
<project>/iOS/Runner/info.plist<key>CFBundleName<key> <string>My App Name<string>
Tips Check our video tutorial! Watch Now
Setup License Key
Generate the license key from inilabs.net and copy the license key and setup in the app source code.
<project>/lib/util/api-list.dartstatic String? licenseCode = "YOUR_LICENSE_CODE";Change Base URL
To change base url replace baseUrl from
<project>/lib/util/api-list.dartstatic String? baseUrl = 'https://your_domain.com';Warning! Don’t put slash (/) at the end of your base url.
Tips Check our video tutorial! Watch Now
Configure Google Map Key
To Configure Google Map Key replace baseUrl
static const mapKey = "PUT YOUR MAP KEY HERE";For Android <project>/android/app/src/main/AndroidManifest.xml
<meta-data android:name="com.google.android.geo.API_KEY" android:value="PUT YOUR MAP KEY HERE" />For iOS <project>/android/app/src/main/AndroidManifest.xml
GMSServices.provideAPIKey("PUT YOUR MAP KEY HERE")Tips Check our video tutorial! Watch Now
Change App Primary Color
To change the app primary color, change the value of primaryColor with your own color hex code.
<project>/lib/config/theme/app_color.dartstatic const Color primaryColor = Color(0xffF36805);Setup Firebase for Push Notification
First you have to change your package name. If you didn’t then follow this.
-
Create your own firebase project from https://console.firebase.google.com and also add an android app there with your own package name and app name.
Warning Do not create multiple project if you have multiple app like User App, Delivery App. Create only one project and add multiple app under project.
-
Click register app and download
google-services.jsonfile from there. -
Copy that file and paste it under
<project>/android/app/ folder. -
For IOS again create an app under same project and download
GoogleService-Info.plistand paste it under<project>/iOS/folder. Also follow this documentation for full setup for IOS: https://firebase.flutter.dev/docs/messaging/apple-integration
Tips Check our video tutorial! Watch Now
App build & release
Build for Android
For debug app build you can run this command:
flutter build apk --no-tree-shake-iconsBuild file location: <project>/build/app/outputs/flutter-apk/ For deploying it please
follow this documentation: https://docs.flutter.dev/deployment/android
Build for iOS
There are no general way to generate app for iOS. Apple doesn’t allow to install app like this debug way. If you want to install it on your iOS device then you have to deploy it on TestFlight or AppStore. For deploying it please follow this documentation: https://docs.flutter.dev/deployment/ios
Key Features Detailed
- Multi-Vendor Restaurant: Support for unlimited restaurants with individual dashboards for menu and order management.
- AI Agent (Magic Agent): Intelligent assistant for generating item descriptions, responding to reviews, and providing sales insights.
- PWA Supported: Progressive Web App for a lightning-fast, app-like experience on both mobile and desktop.
- Built-in Free POS: Powerful Point of Sale system for restaurants to handle walk-in customers and manual orders seamlessly.
- Scheduled Delivery & Takeaway: Flexible ordering options allowing customers to choose between home delivery or self-pickup at their preferred time.
- Order Tracking & Dispatch: Robust dispatch management with real-time order status tracking for customers and admins.
- Multi-Language & RTL: Reach a global audience with built-in multi-language support, including RTL (Right-to-Left) for Arabic and similar languages.
How to Install PWA (Mobile & Desktop)
FoodNanny's website is ultra-responsive and works as an app via PWA:
- On Android: Open the website in your mobile browser. An "Install The App?" prompt will appear automatically. Click the Install button to add the application to your home screen.
- On Desktop: In the Chrome address bar, click the Install icon (plus sign) to use it as a standalone app.
Order Management Lifecycle
Manage the flow of orders effectively:
- Location-Based Discovery: When a customer visits the website, the system first requests their location. It then intelligently displays only the restaurants available within their specific delivery zone or area.
- Order Placement (Pending): The customer browses the menu and places an order. The order initially appears in the "Pending" state in the Admin and Restaurant panels.
- Restaurant Acceptance (Accept): The Restaurant owner reviews and accepts the order. This confirms the availability and begins the preparation phase.
- Smart Rider Visibility: Once accepted, the order becomes visible to Delivery Men (Riders) who are located near that specific restaurant. Riders only see orders within their proximity to ensure fast pickup and delivery.
- Rider Acceptance & Pickup: A nearby rider accepts the order and proceeds to the restaurant. After picking up the food, they mark it as "Out for Delivery."
- Delivery Completion (Delivered): The rider reaches the customer's location and marks the order as "Delivered," completing the lifecycle.
- Other States: The system also handles Canceled, Rejected, and Returned statuses for various order scenarios.
Changelog
Version 1.0 (14 February, 2026)
- - Initial Release
- Version: v1.0
- Created:14 February, 2026